Getting Started - Your First Report
Creating your first report automation with PushMetrics
The report we create will send out the result of a SQL query along with an Image export of a Tableau View attached to an Email.
You can follow along using our demo data or with your own SQL connection.
Create Your First Report
In PushMetrics, Reports let you create a simple push of document exports to several destinations:
- Slack
- Microsoft Teams
- Uploads to S3, SFTP etc.
Creating a Report consists of 5 essential parts:
1. Settings the Report name and destination
2. Selecting the Contents that you want to attach or send in the report
3. Defining the recipients and message
4. Defining a Schedule or a Webhook as a trigger for your report.
Navigate to Reports using the top navigation or this link.

Click the Create Report button or use this link.
1 - Set a Name and a Destination
You probably guessed it, you can freely choose a name of your Report.
Right below that input, you will find a choice of Report Destinations.
For this exmple we will choose Email.

2 - Select your Contents
These contents will later be attached to your Email automatically.
We will create two content attachments for this example.
- One SQL query result as CSV
- One Tableau View export as PNG (image)

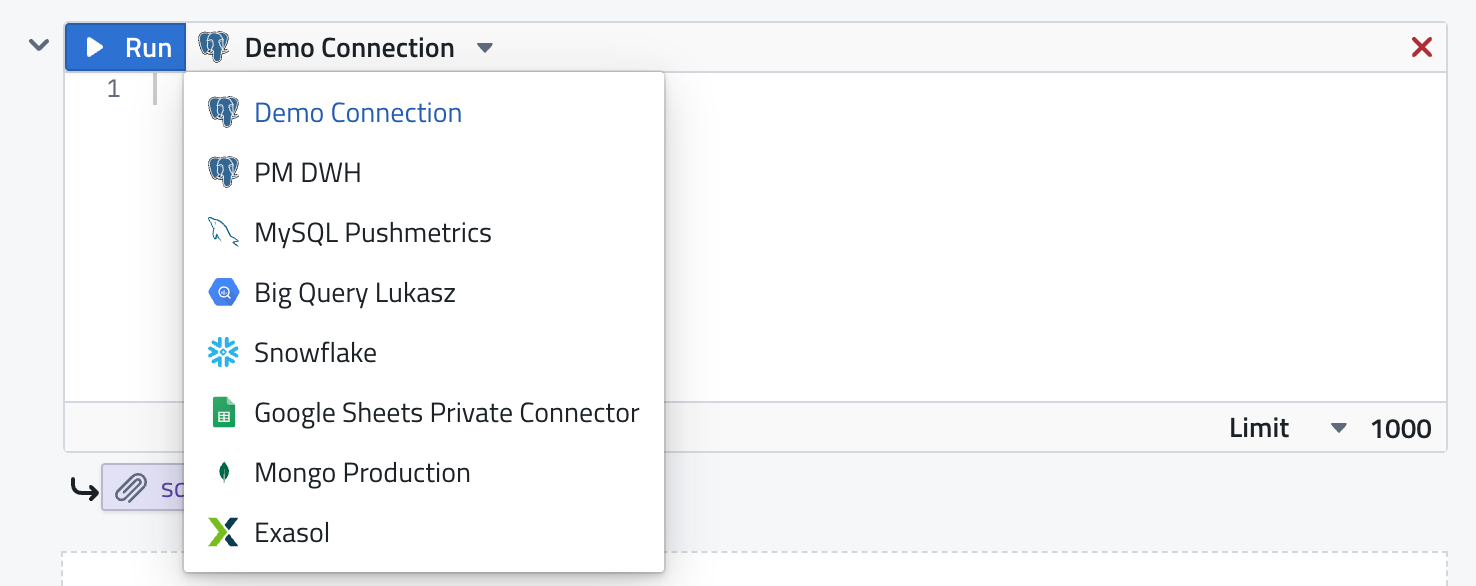
2a - Creating a SQL attachment
To create the SQL attachment, click on the SQL button. This will create a SQL block that you can then use to write a query and run.
If you're using the demo data, I suggest using the same query as me.
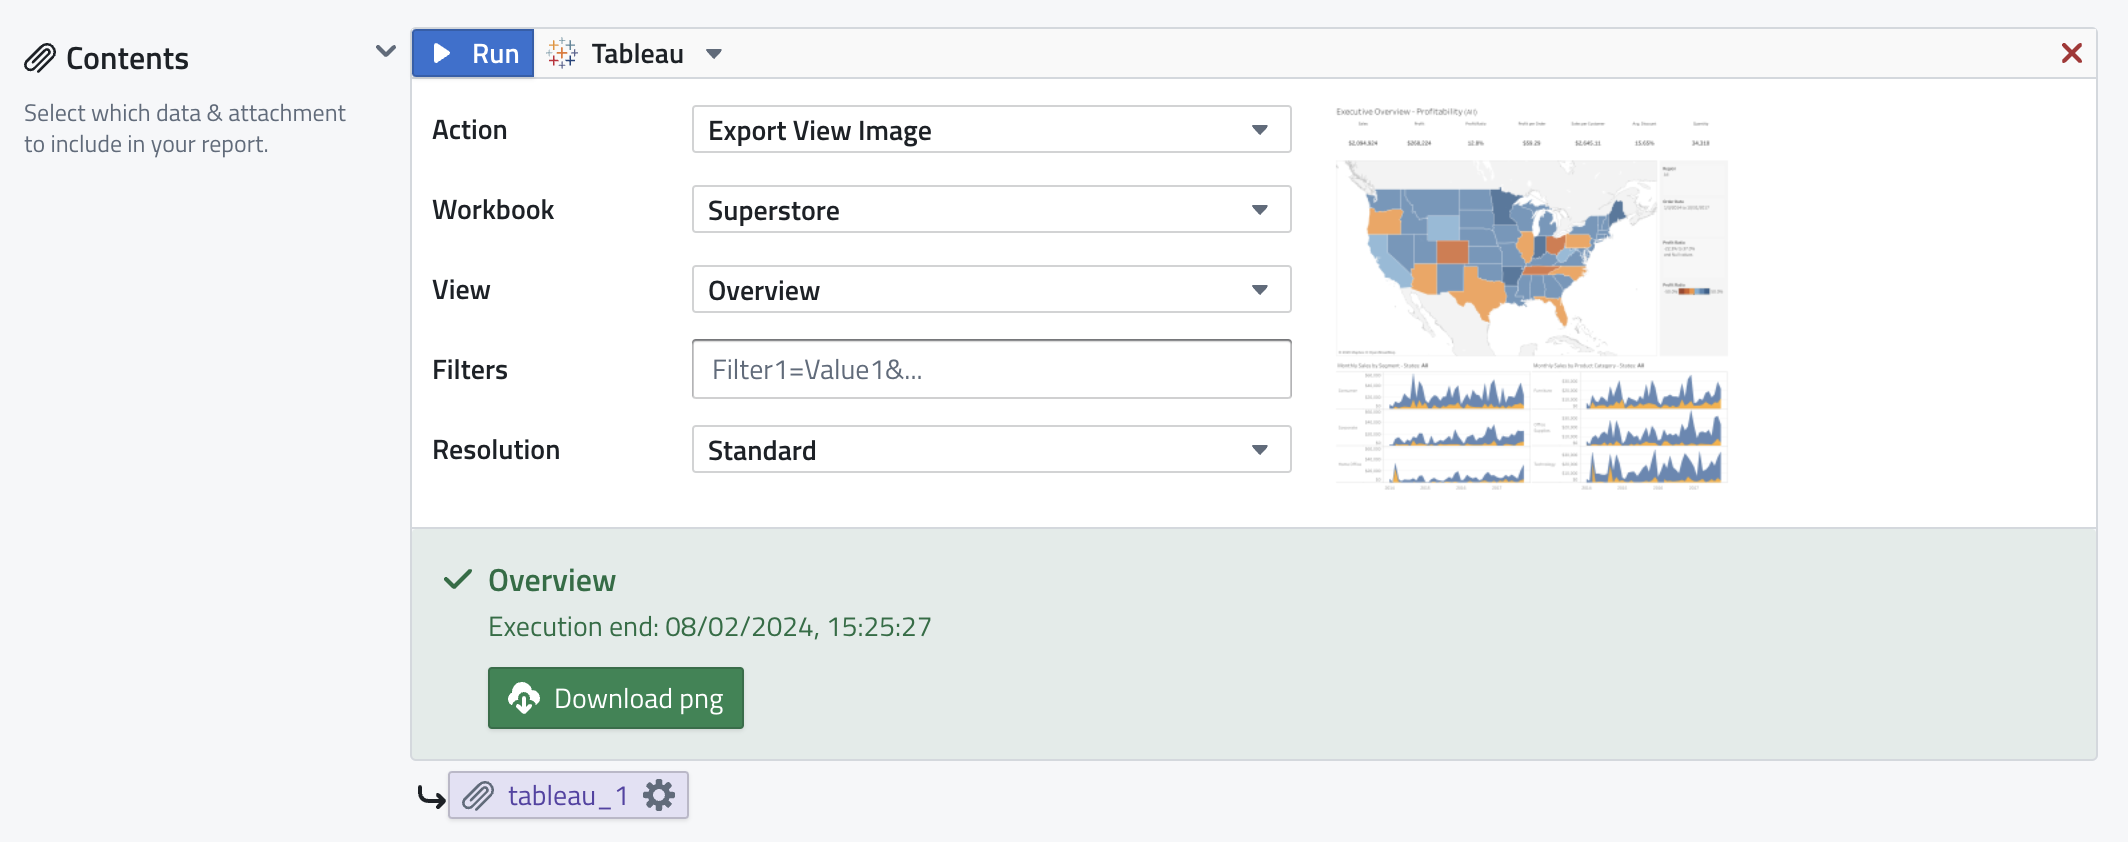
2b - Creating a Tableau attachment
The team will be more than happy to supply you with a demo Tableau connection.
You can create many different attachment types using the Tableau integration.
For this example we will do a simple image export without any filters.
Feel free to play around with the options you have here.
3 - Craft a Message
You don't have to, actually.
Sending an empty message is possible. Your attachment will still be delivered.
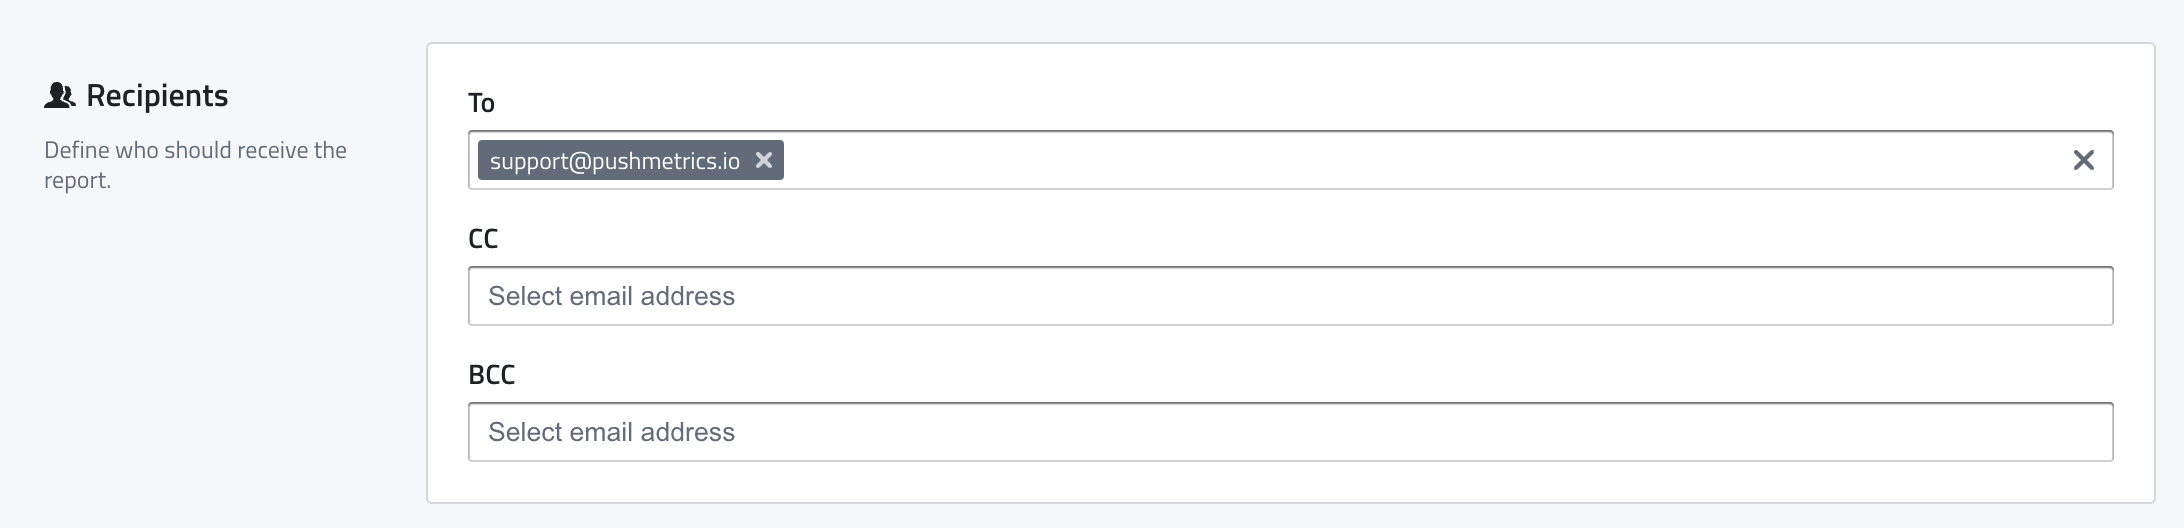
What you do need is at least one recipient and a subject.
And there really isn't much to explain about the recipients or. Simply fill in your Recipients, CC, and BCC:
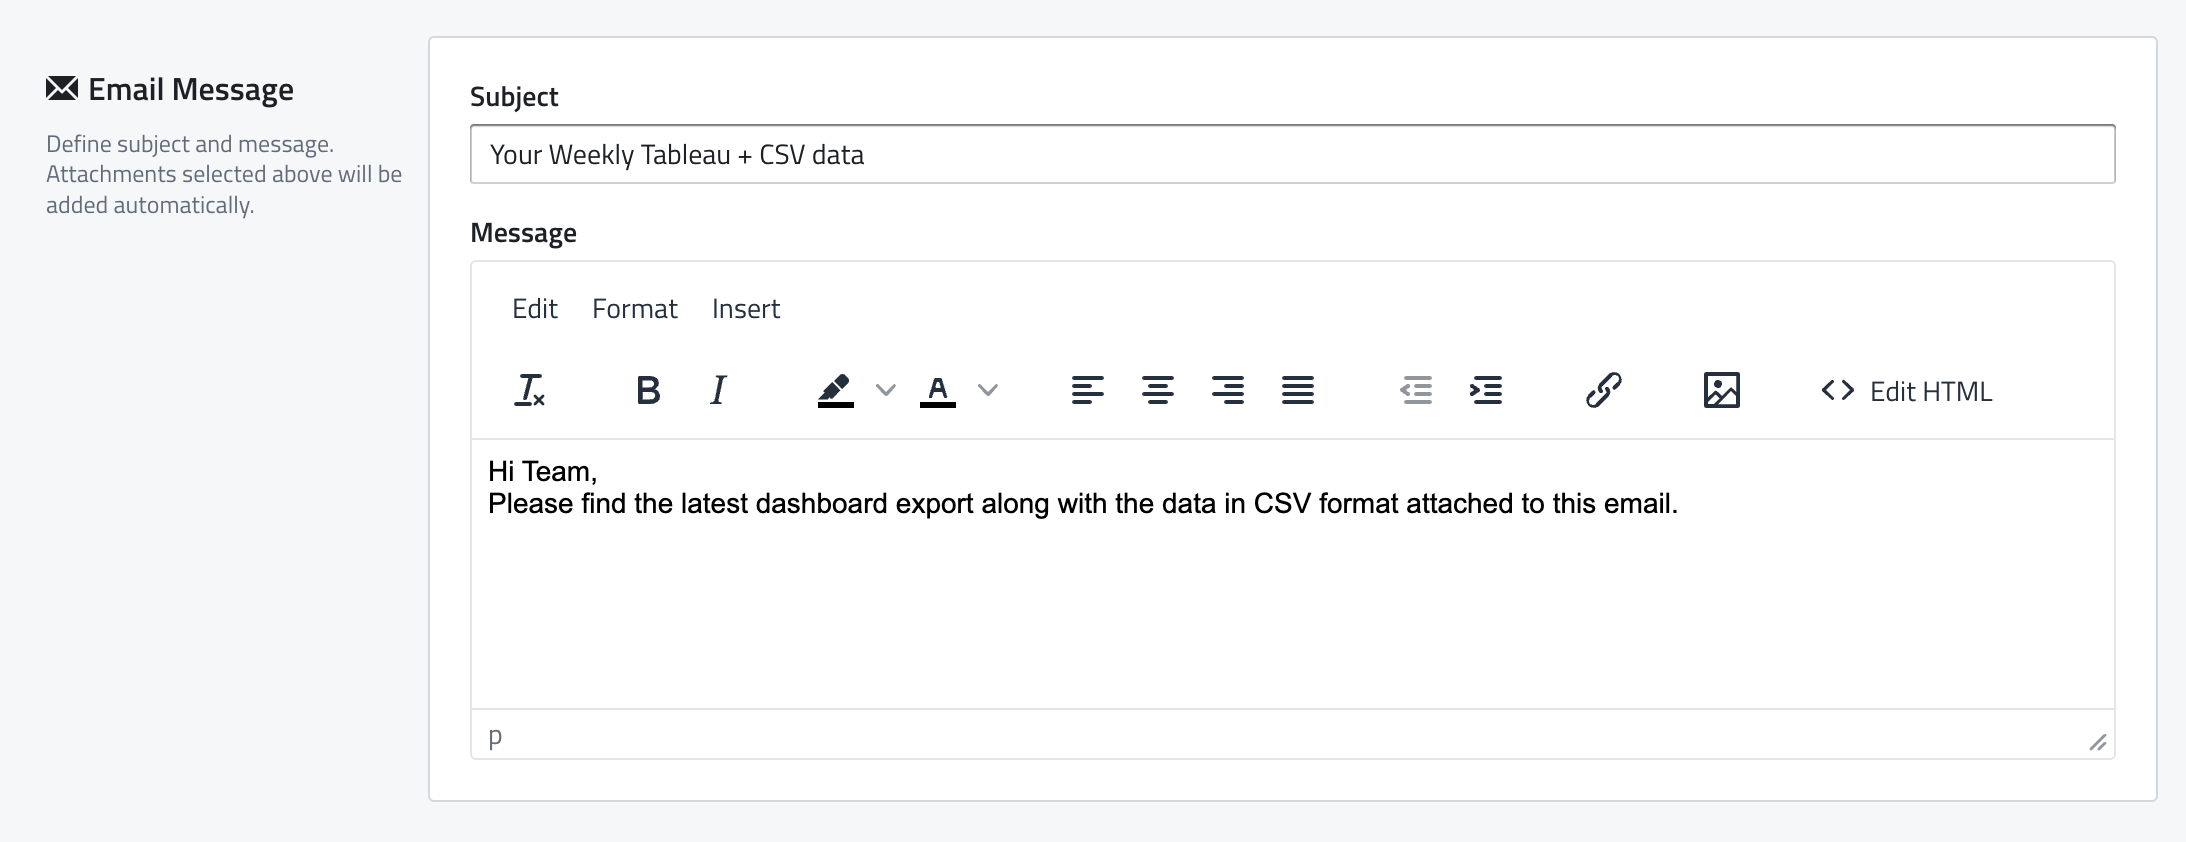
The Message Editor
To send a message body along with your attachment you have all the bells and whistles in our Message Editor.
For this example we are sending a very simple message but you have all the possibilities of what you want your message to look like.
EXAMPLE OF A MORE FANCY EMAIL
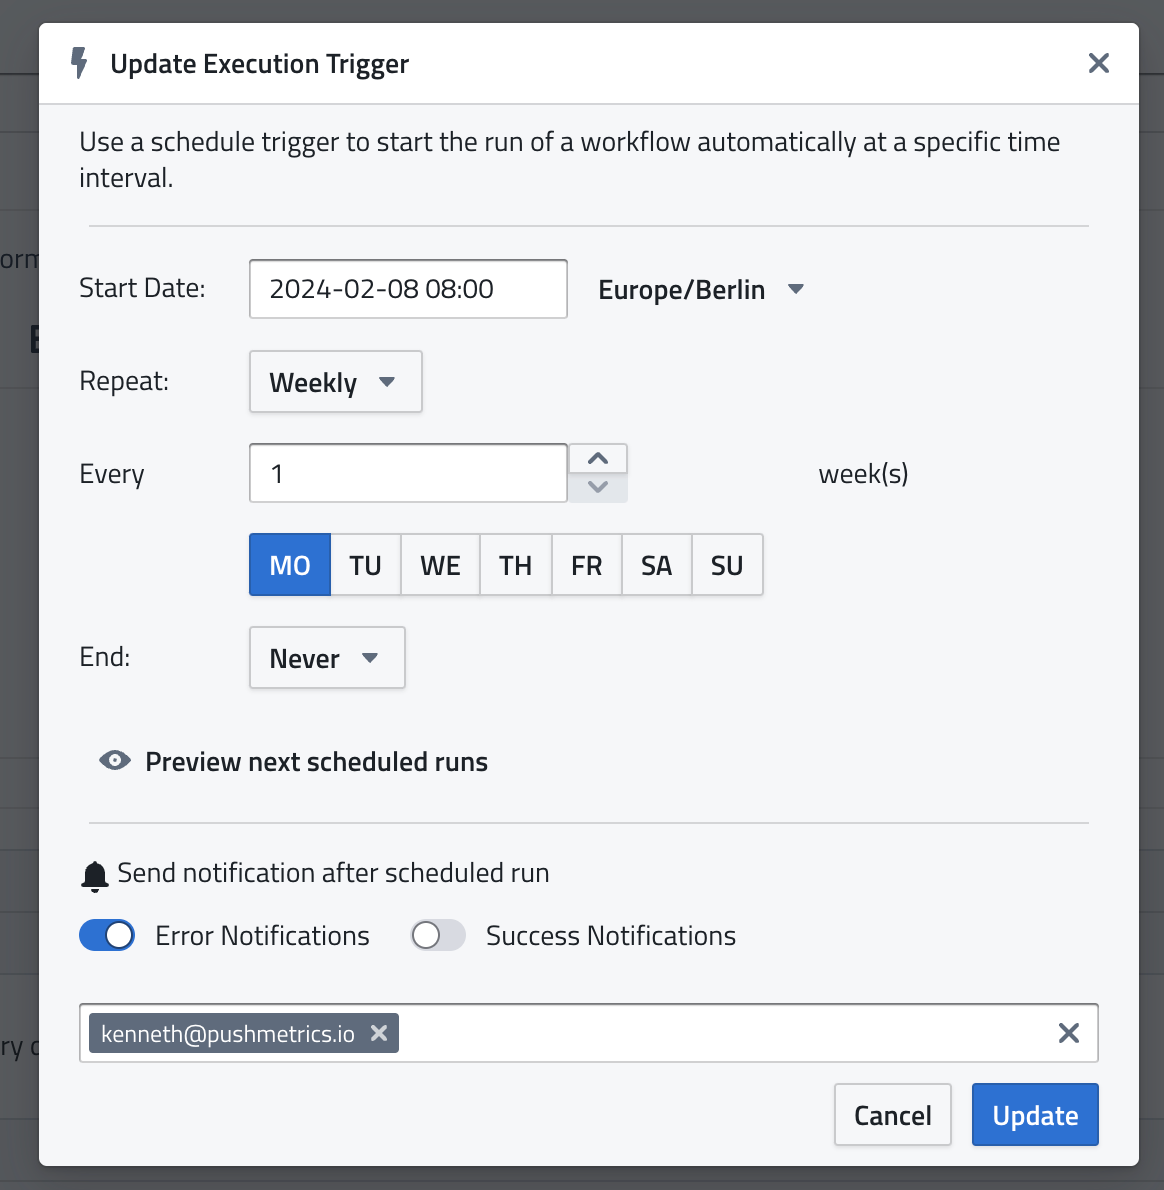
4 - Pull the Trigger
A trigger can be you, manually running it, a Schedule, or a Webhook that runs the workflow whenever it receives a request.
For this example we will simply set this Report to send out every Monday morning at 8AM, forever.
The schedule lives on the very bottom of the report and you can change it by clicking the edit button.
5 - Test it, set it Live
Once you're happy with your report, you can hit "Save" at the very bottom.
This will take you back to the reports list, from where you can manually run it for testing. And also flip the switch to activate it.
This is what it should look like:

That's it 🎉
Welcome aboard!
Don't hesitate to contact us if you have questions!
