Getting Started - Your First Notebook
Creating your first report automation with PushMetrics Notebooks
The creation of a SQL-based report that is then scheduled and sent out via email.
You can follow along using our demo data or with your own SQL connection.
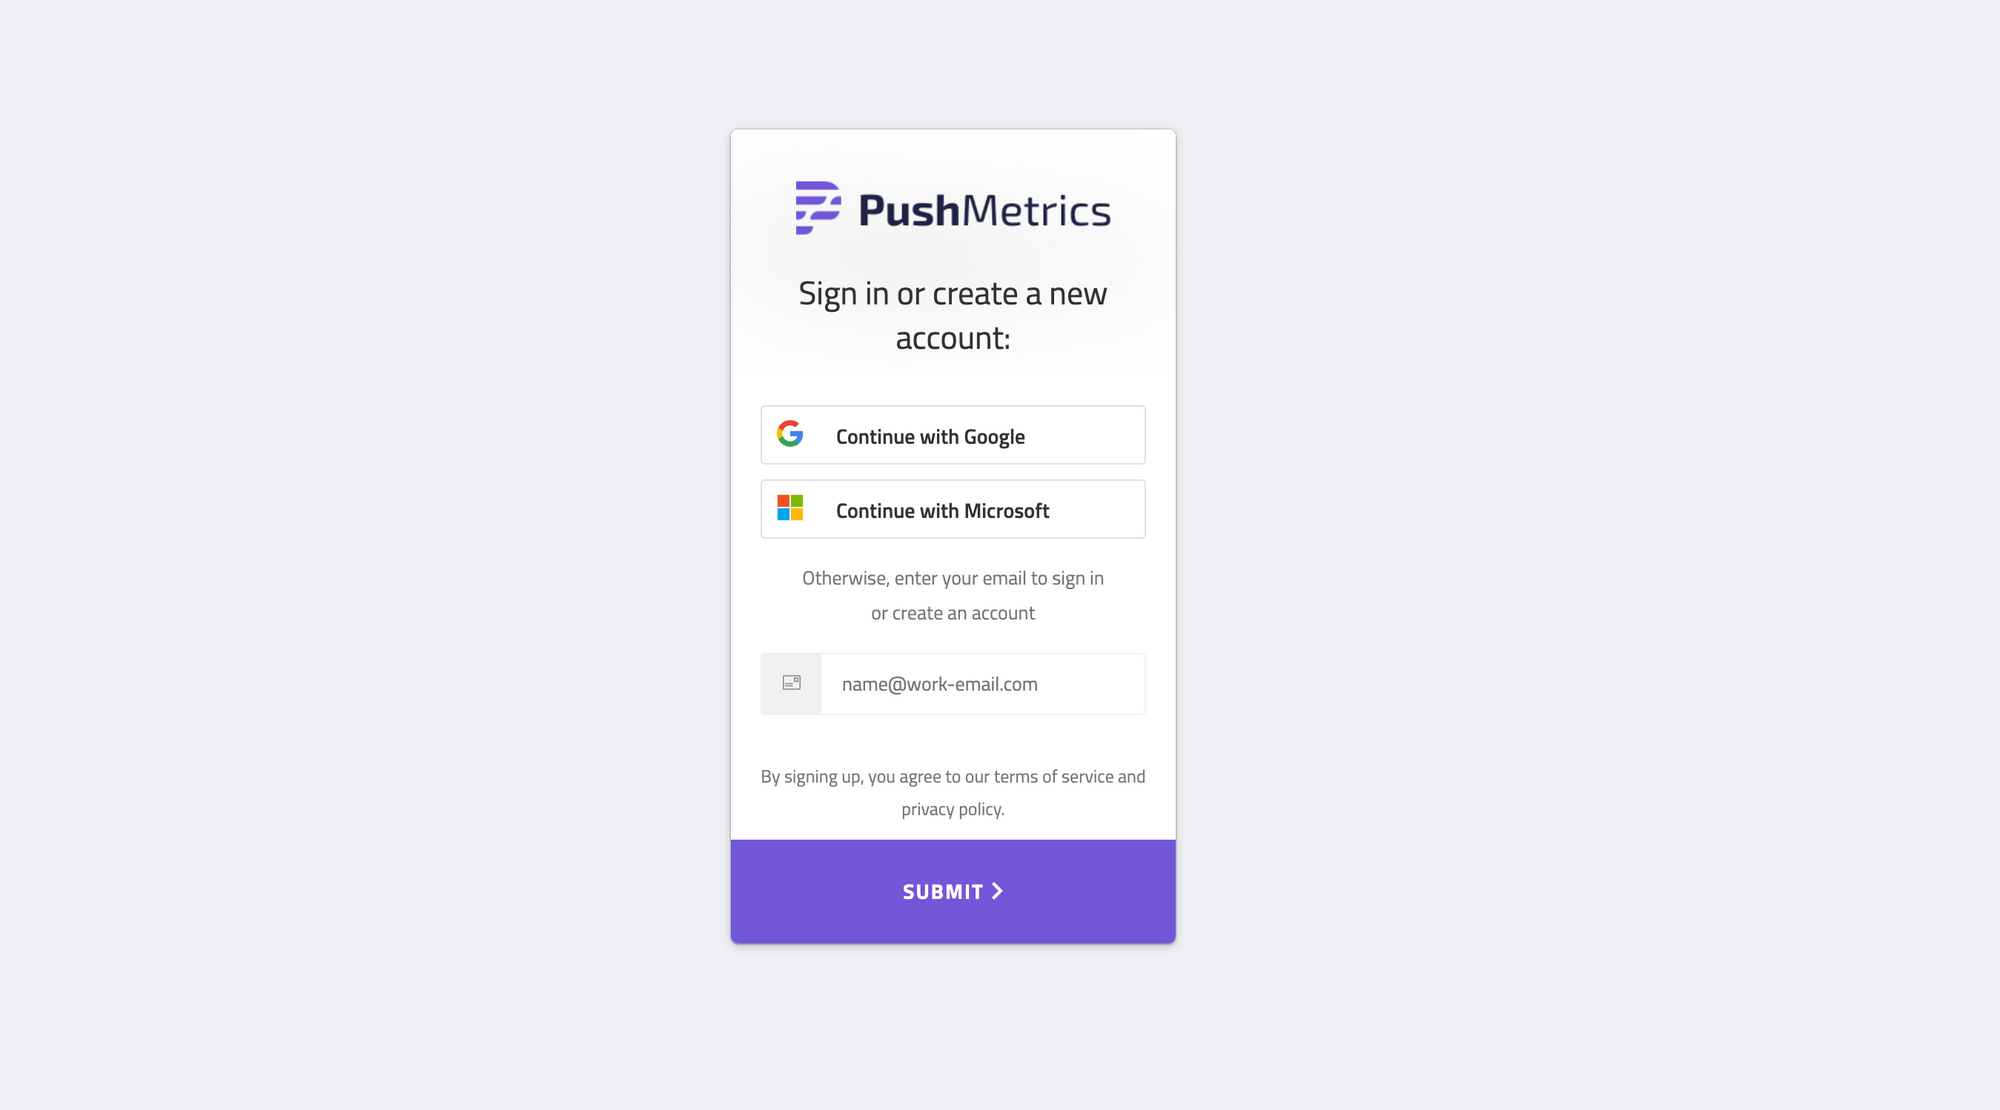
Create A PushMetrics Account
If you don't have a PushMetrics account yet, you can sign up here and start a 14-day free trial.
Every new account comes with a (read-only) SQL database connection with some demo data to play with.
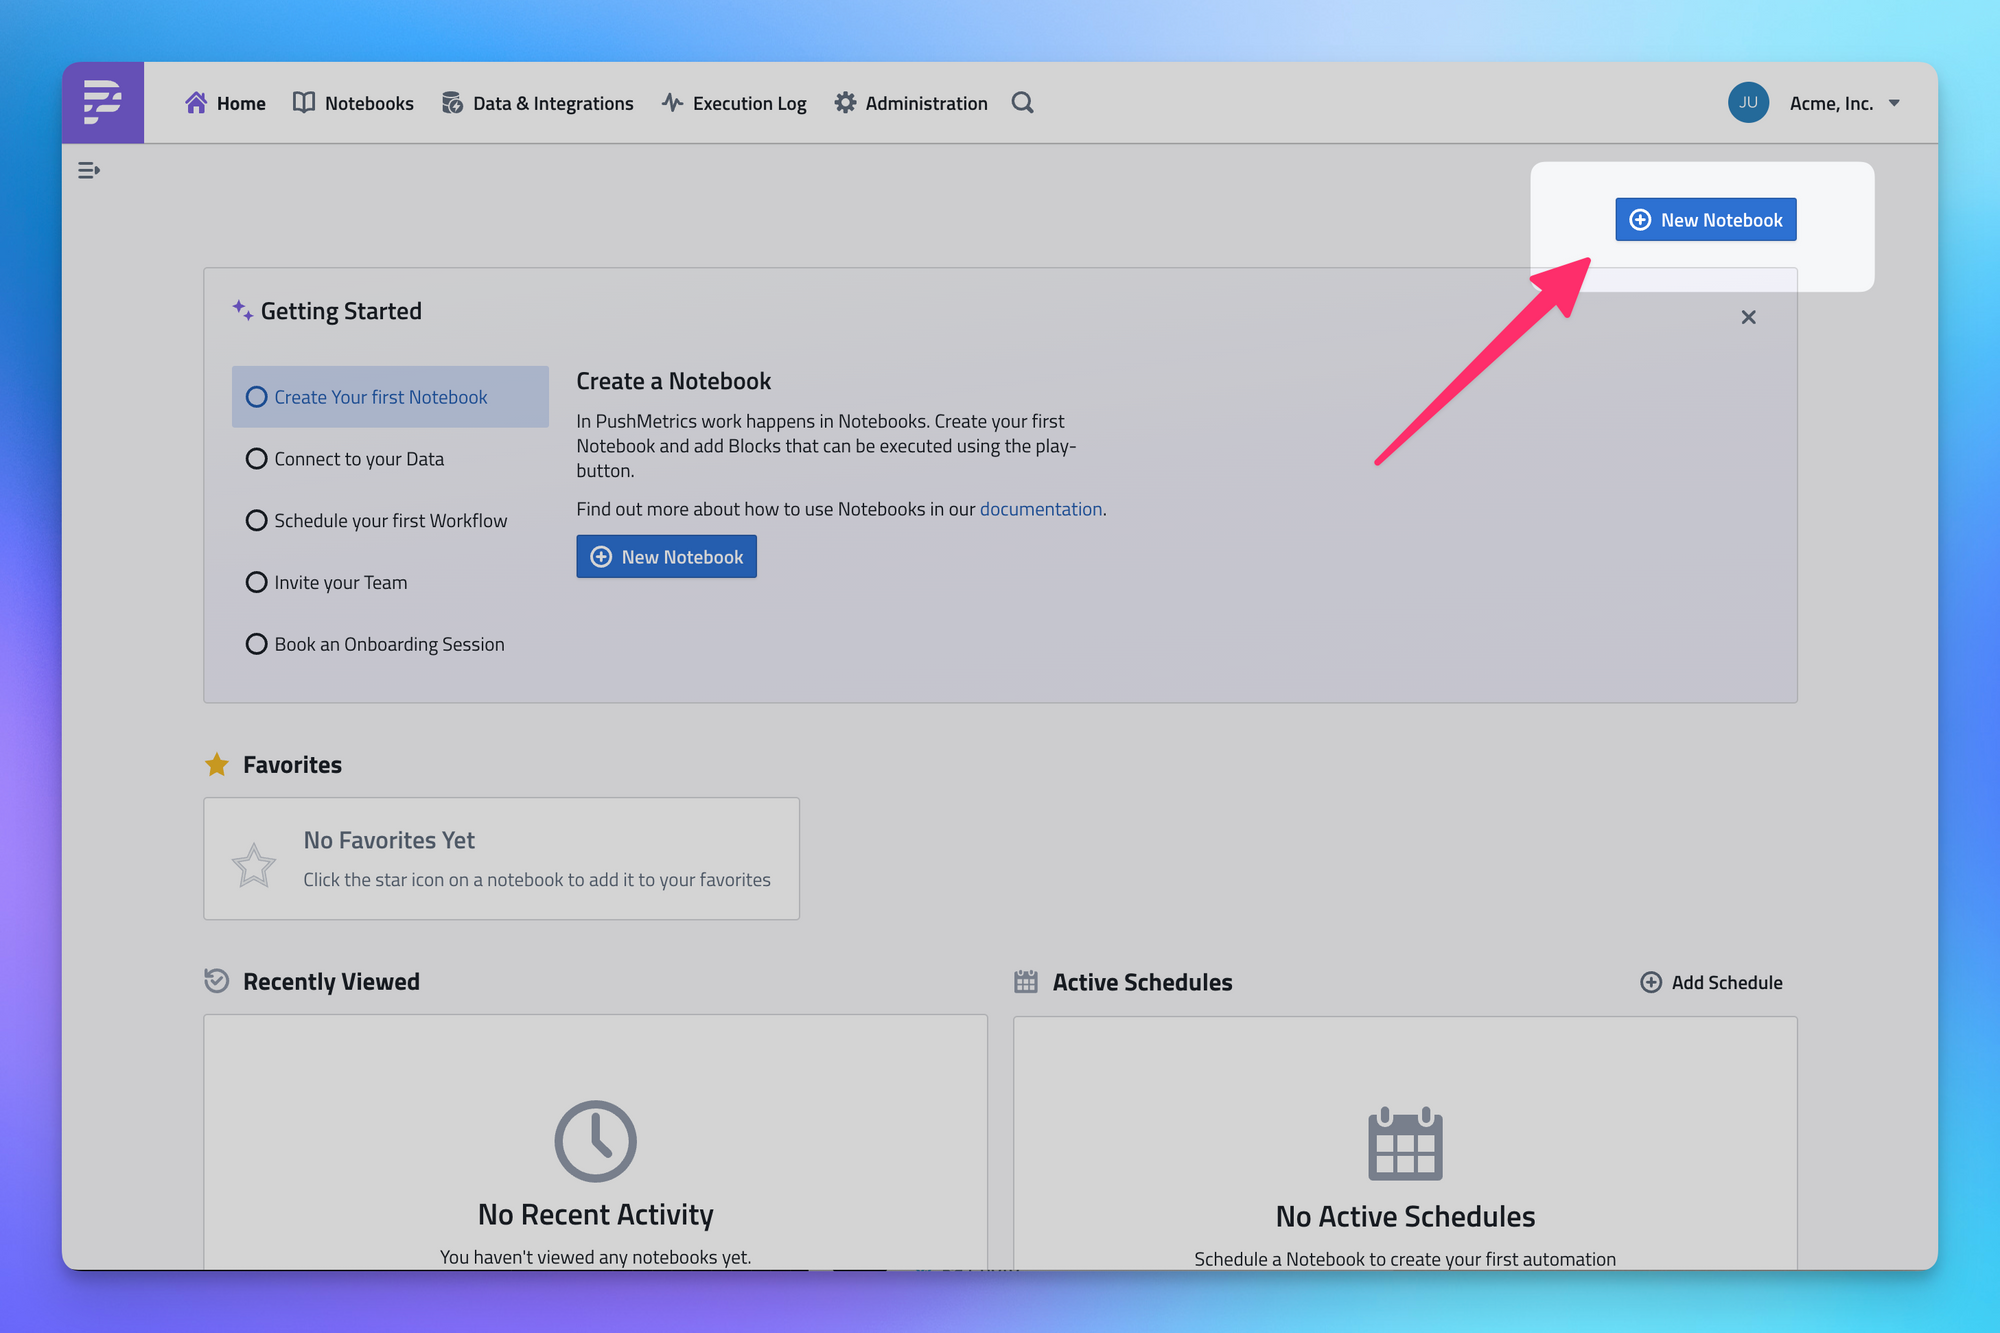
Create Your First Notebook
In PushMetrics, Notebooks are the documents in which you create all your workflows.
Notebooks contain the tasks and the logic of a workflow, they can be executed and scheduled.
To create your first notebook, select "New Notebook" from the menu on the home screen.
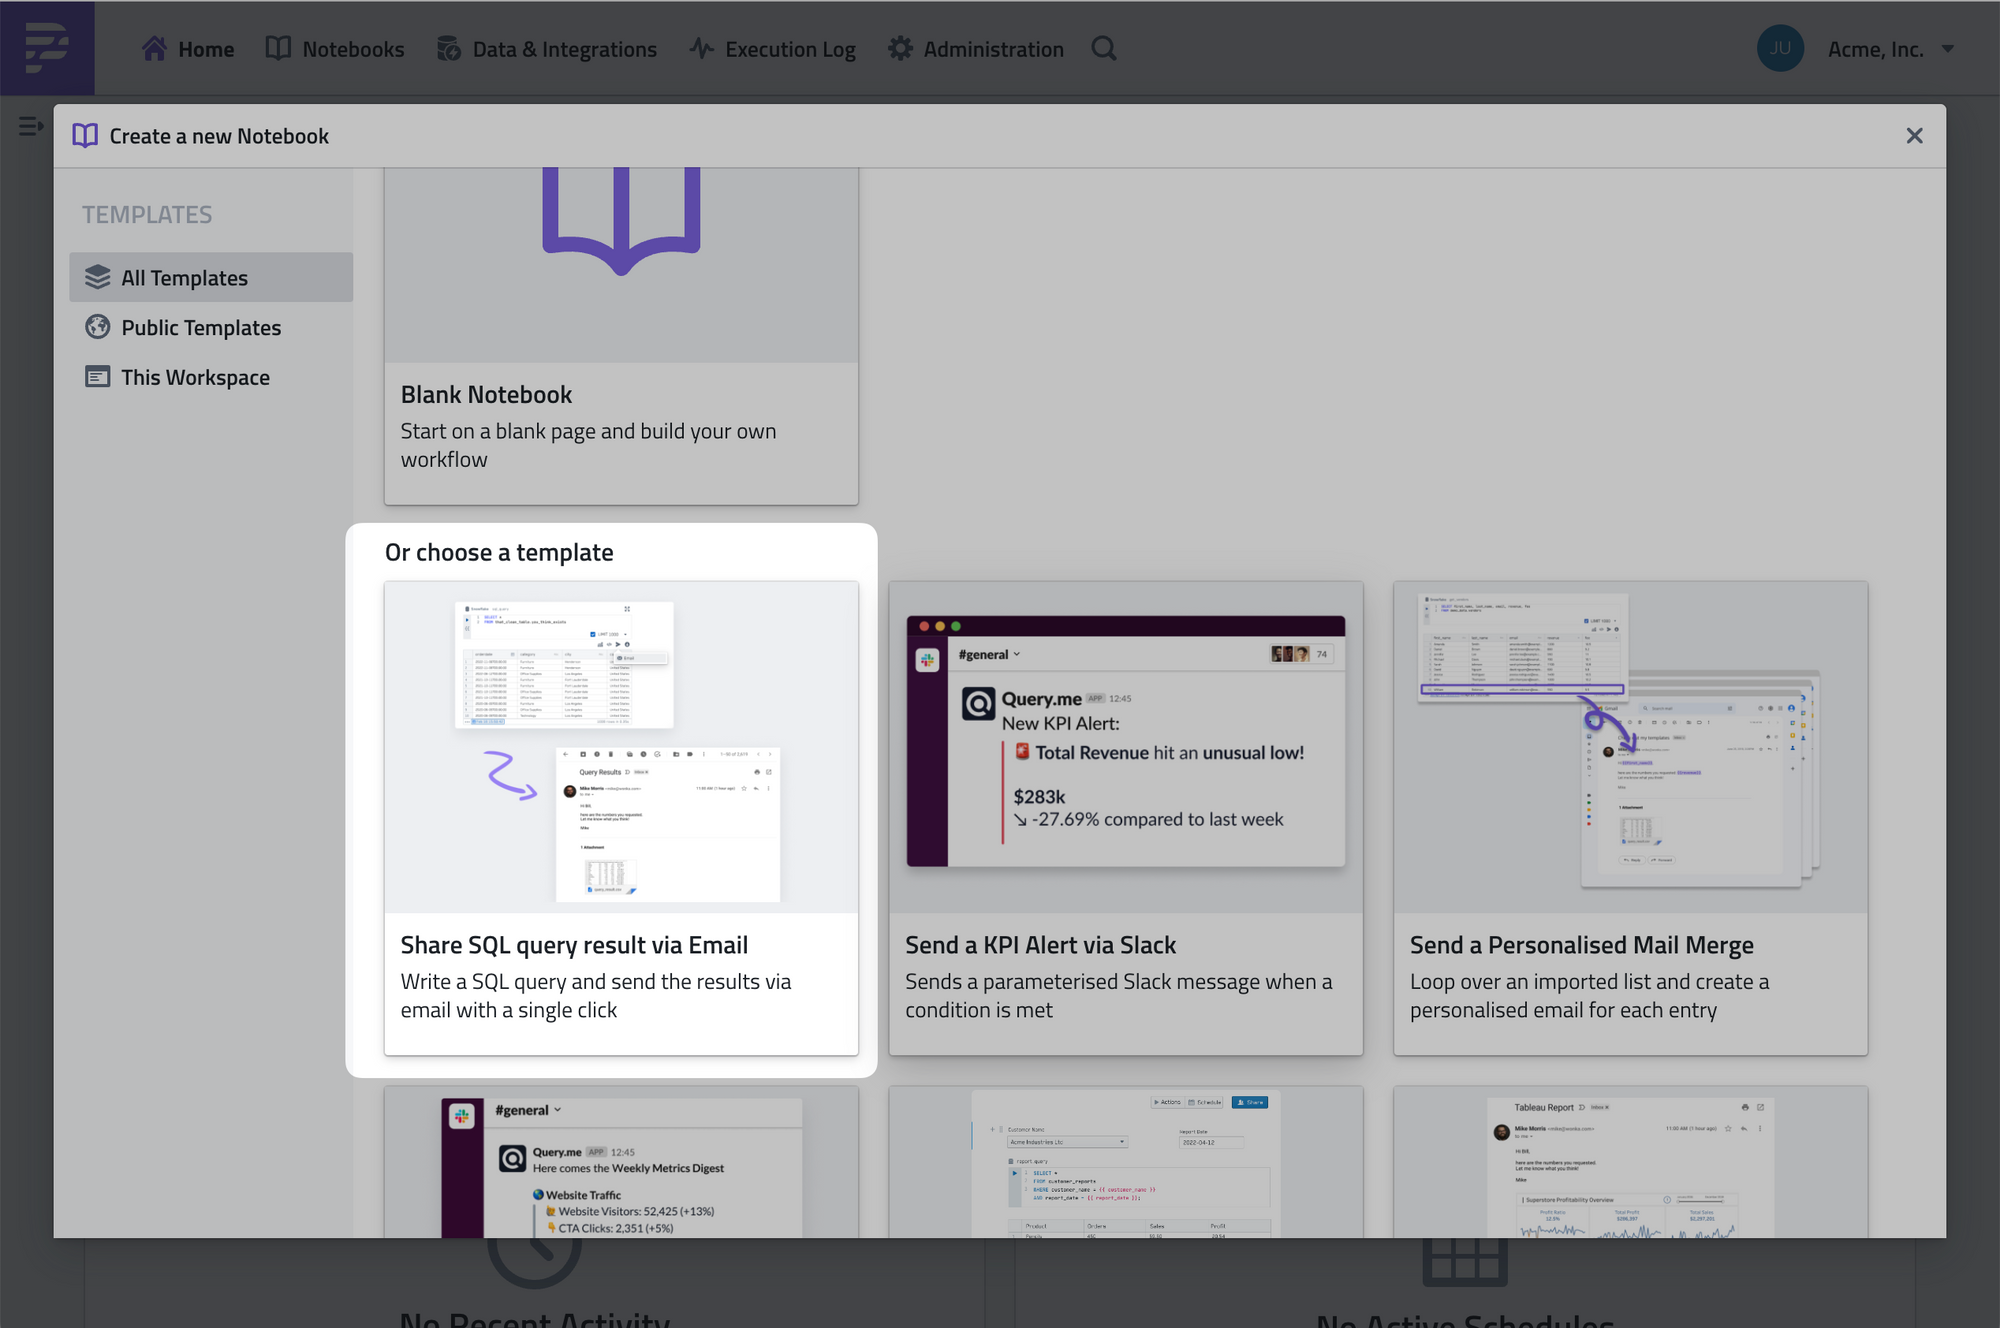
You can either use a Notebook template or you can start on a blank page and build a workflow from scratch.
For this tutorial, please select the "Share SQL query result via Email" template:
Nice - you have just created your first notebook!
It should look like this:
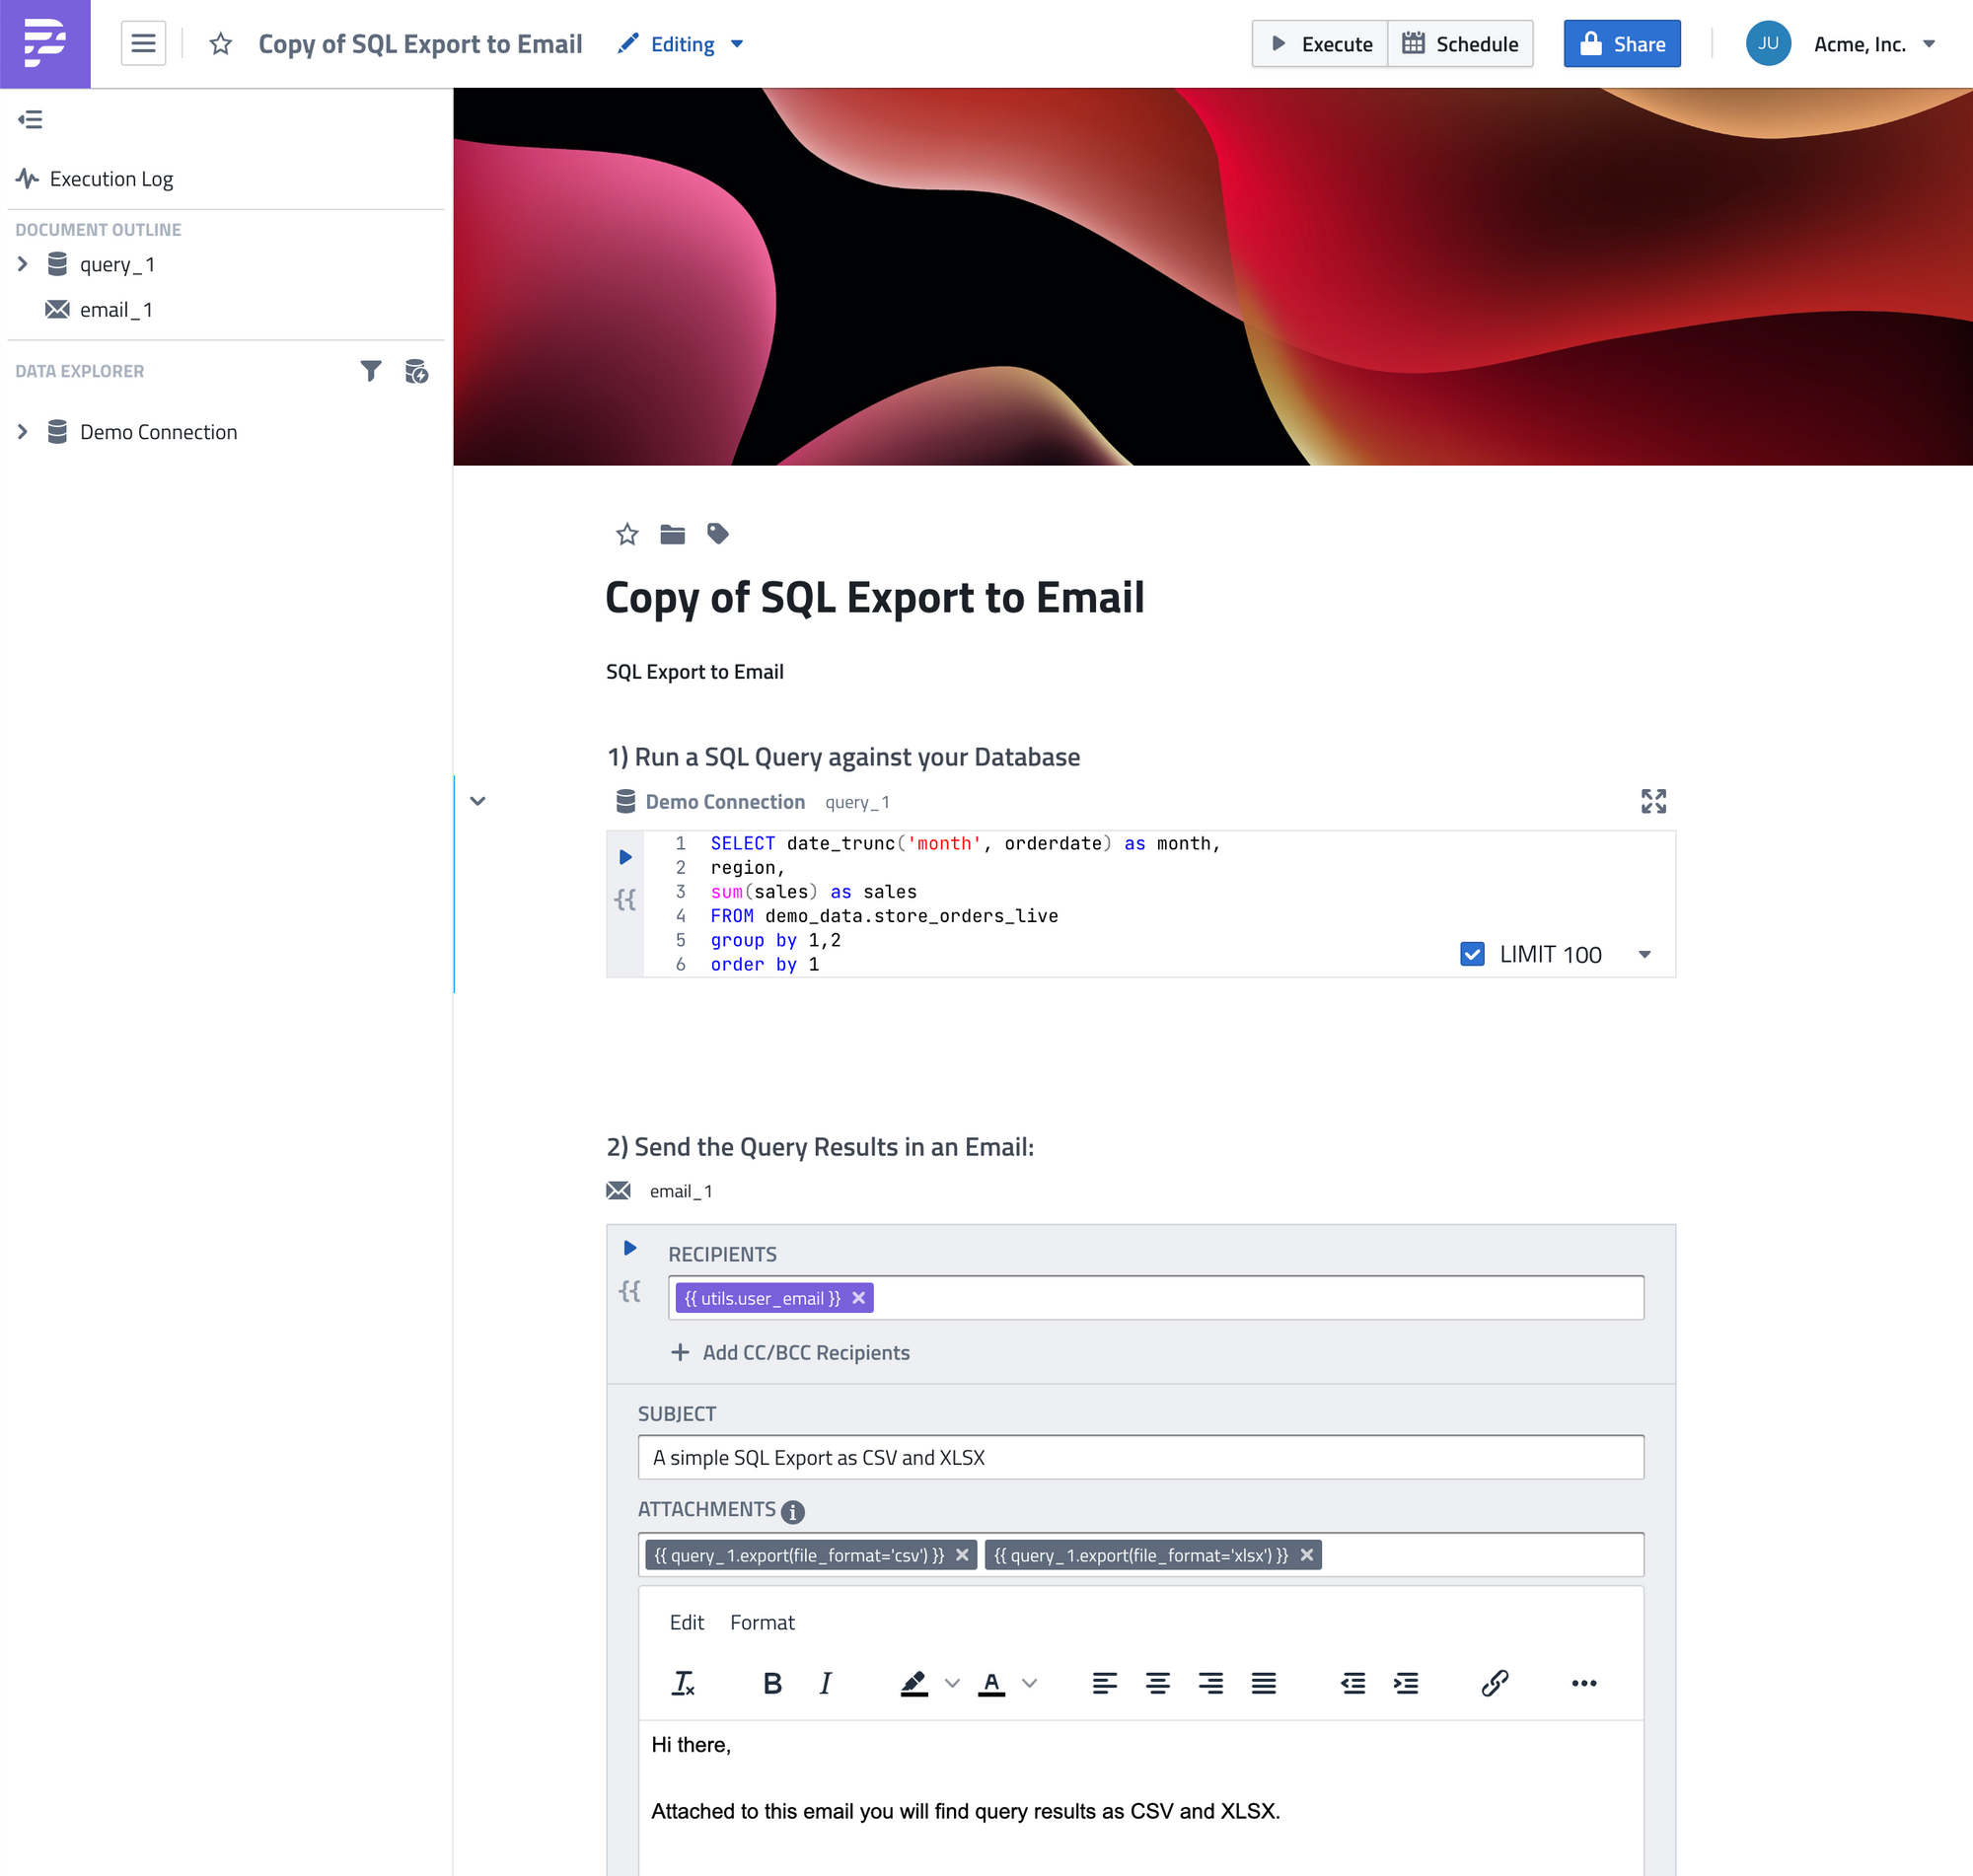
As you can see, there are two tasks in the notebook:
- a SQL query called
query_1 - an Email task called
email_1
In the next step, we will customize those tasks to our needs.
Connect Your SQL Database
Now is a good time to connect your own SQL database, so you can create your first report with your own data.
Go to the SQL query task and click on the database icon in the top left.
From this menu, you decide which database the query should be run against.
From the menu, select "New Database".
Next, select your Database Type and fill out the corresponding form.
Make sure your database is accessible to PushMetrics' servers.
Run Your First SQL Query
Now it's time to execute your first SQL query.
Exploring the Database Schema
Let's first take a look at the sidebar on the left. Here, you can explore the database's contents like schemas, tables, and columns - making it easier to develop your SQL queries.
When hovering over a table name, you can also preview 100 rows of any table and copy a SELECT * statement to your clipboard.
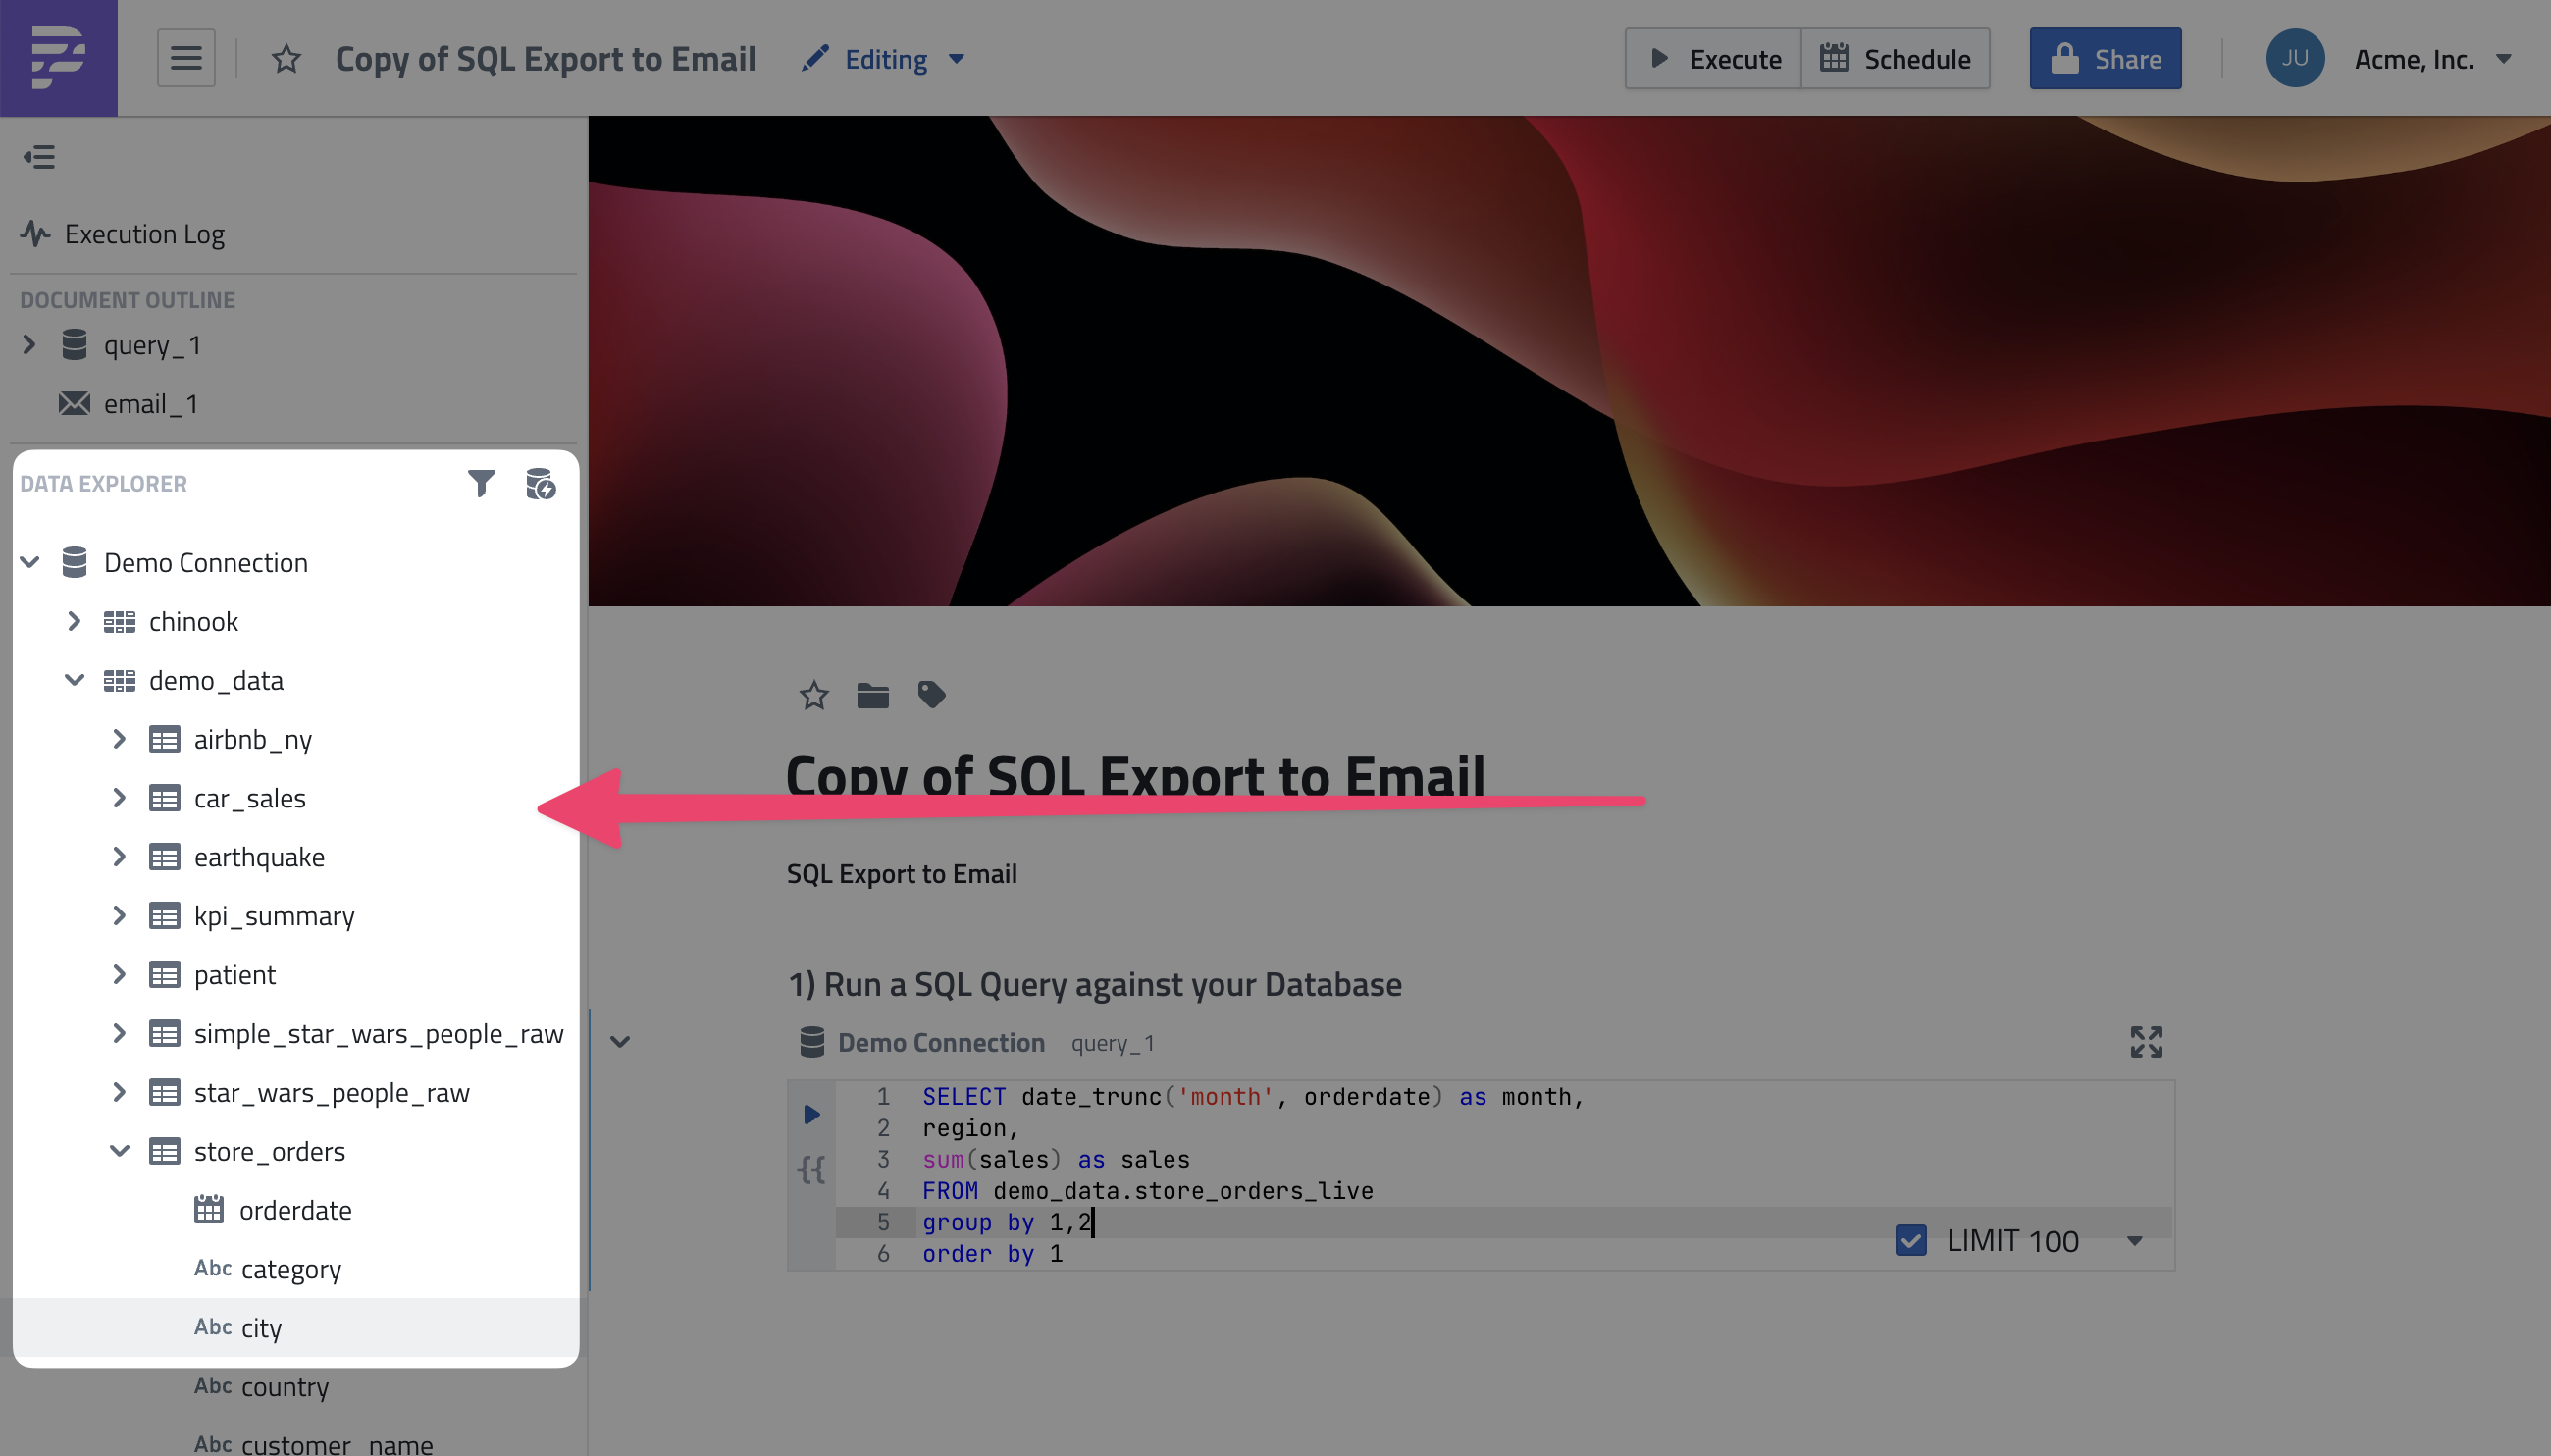
Running the Query
If you are connected to your own database, simply change the query to something that works on your database.
If you use the demo database, you can just leave the query as it is and hit the run button (the play icon).
You can also run a query with the keyboard shortcut ⌘ + enter.
After a short moment, you should see the query results below the SQL statement.
Customize Your Email Message
Now that we have our query results, let's send them out via email.
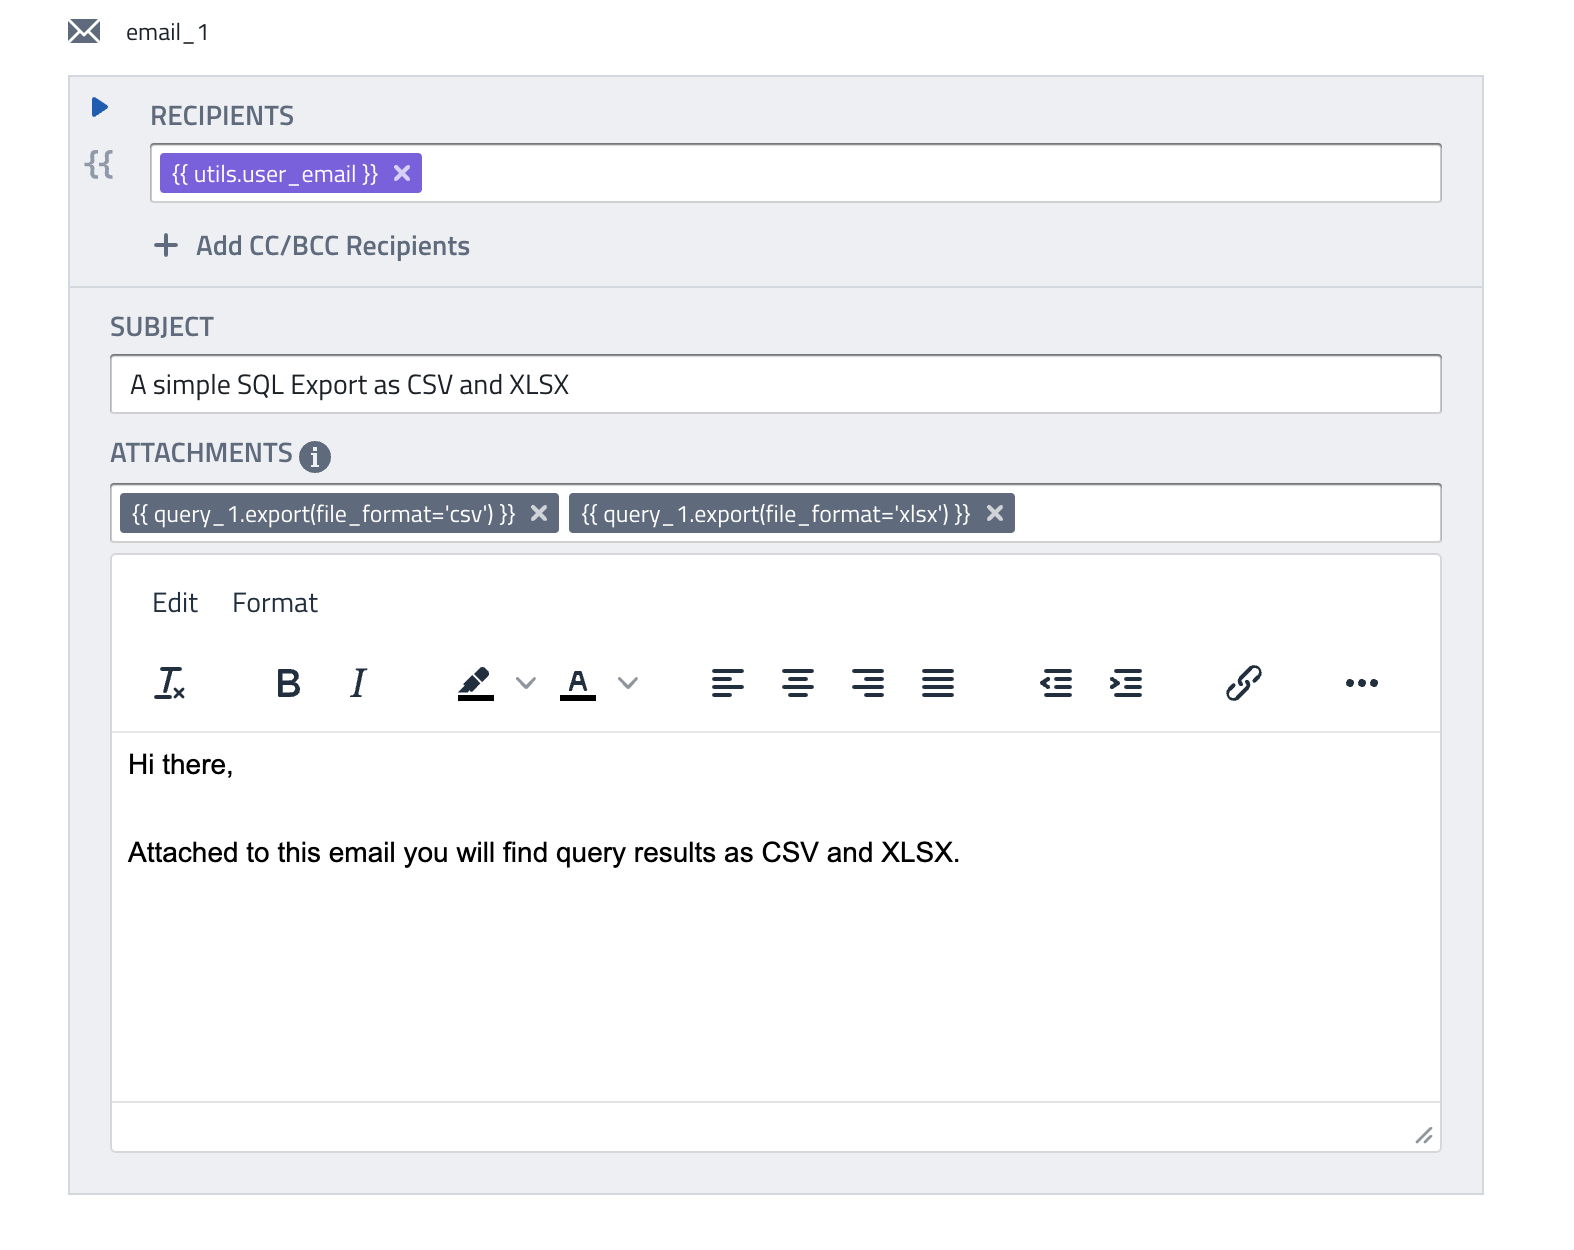
Let's have a closer look at the email task:
- In the Recipients field, we have
{{ utils.user_email }}- this is a utility function that ships with PushMetrics. It returns the email of the current user (i.e. your email). - You can replace it or add more emails simply by typing them out - email recipients do not need to be users of the app - you can send to anyone!
- In the attachments, you can see two entries, that call the
.export()function on our SQL taskquery_1. The first one will give us the results as a CSV, the second as a XLSX file. - You can use references like this everywhere in the app and use data from one task in another task, thus creating a dependency between them.
For example, you could add{{ query_1.data[0].sales }}to the body of the email and upon sending it would print the value of the "sales" column of the first row from the SQL result.
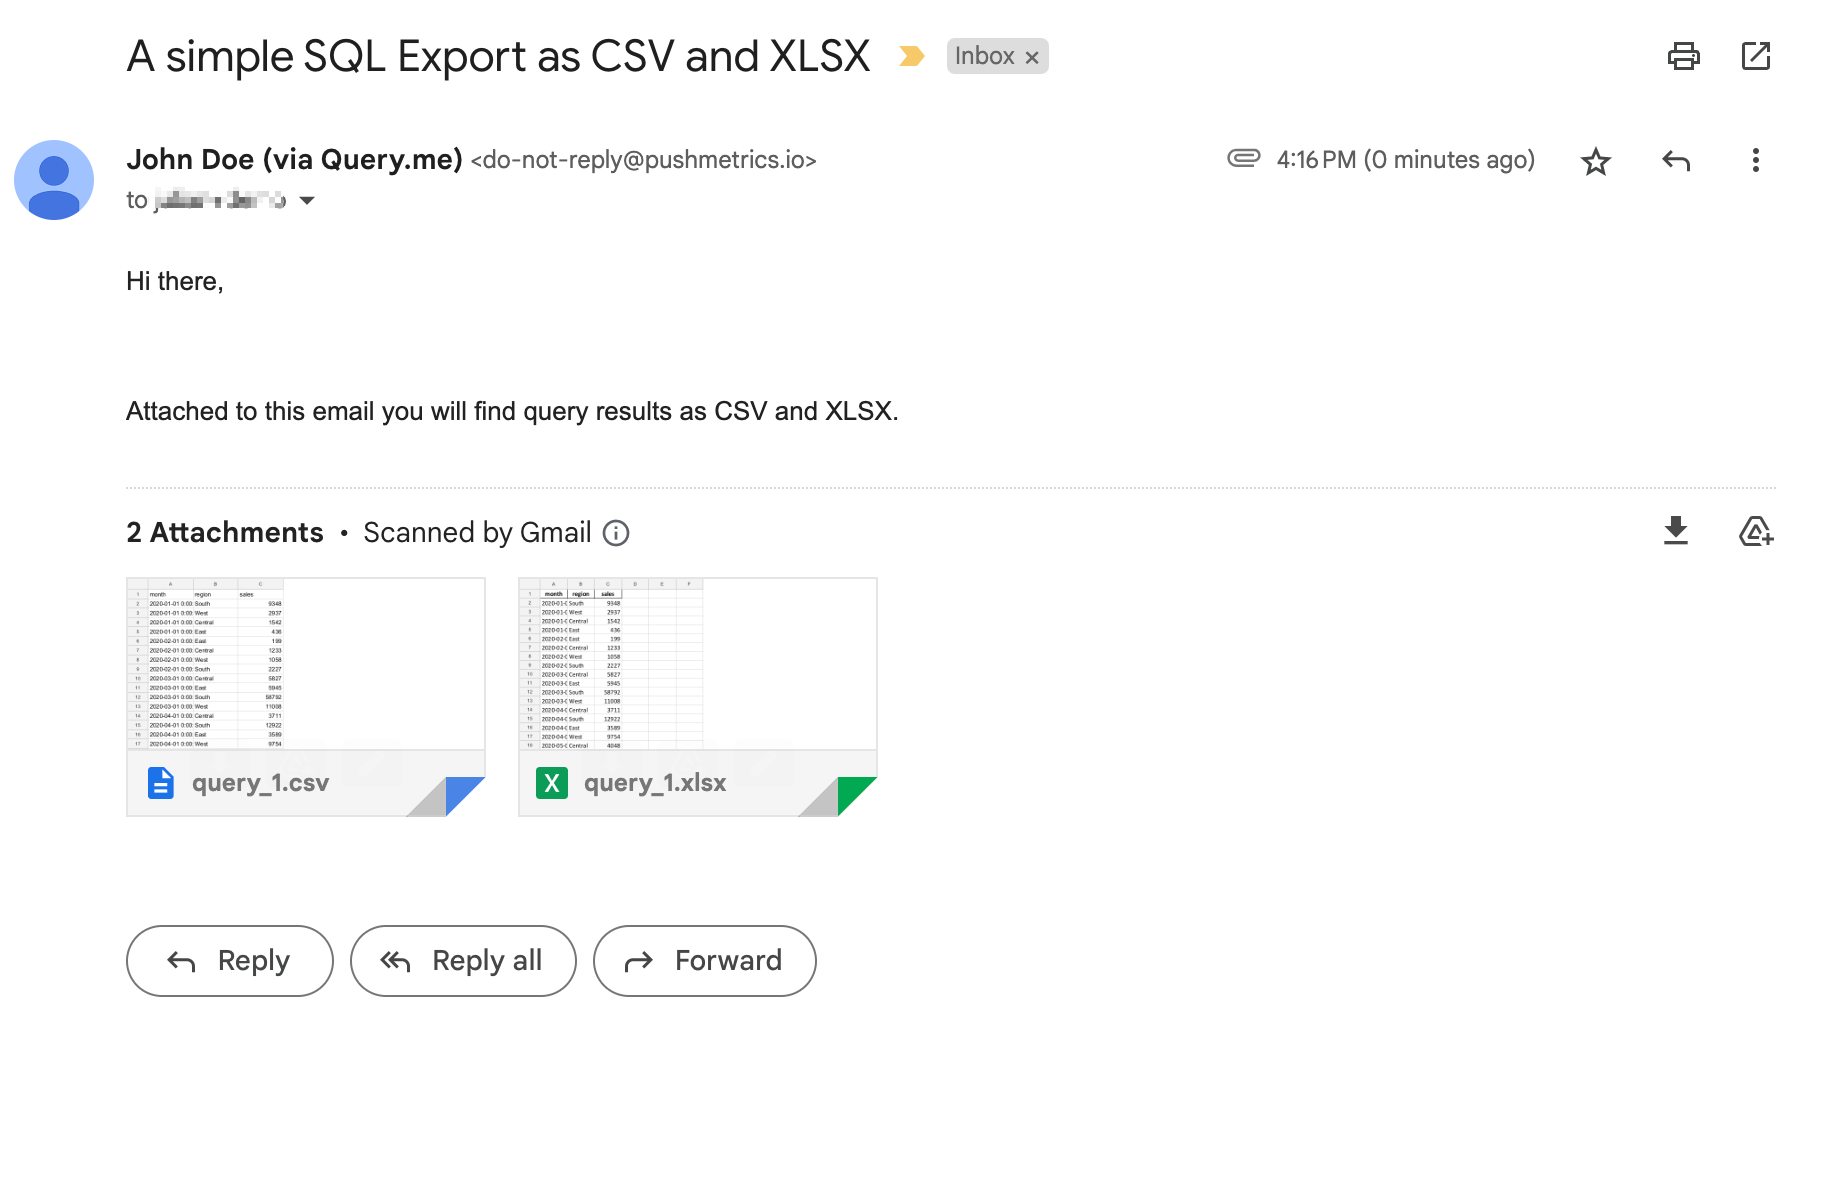
Let's Give it a Run
Our first simple workflow is ready to go. Let's execute it by clicking on the "Execute" button in the top right.

Now, PushMetrics will run all tasks in the Notebook. It will figure out the right order automatically.
In this example, it understands that we first need to run the SQL query and only afterward can send the email.
Check your inbox:
Schedule & Set It Live
Instead of having to run this report manually all the time, we want to automate it and run it regularly on a schedule.
Scheduling notebooks is very easy.
Click on the Schedule button in the top navigation bar.
- Pick your desired scheduling frequency
- Decide if you want to receive notifications in case the report succeeds and/or fails.
- Finally, click "Save" and you are done. This report will now be sent automatically at the set interval.
- To run it manually, click on the
...and select "Run Now"
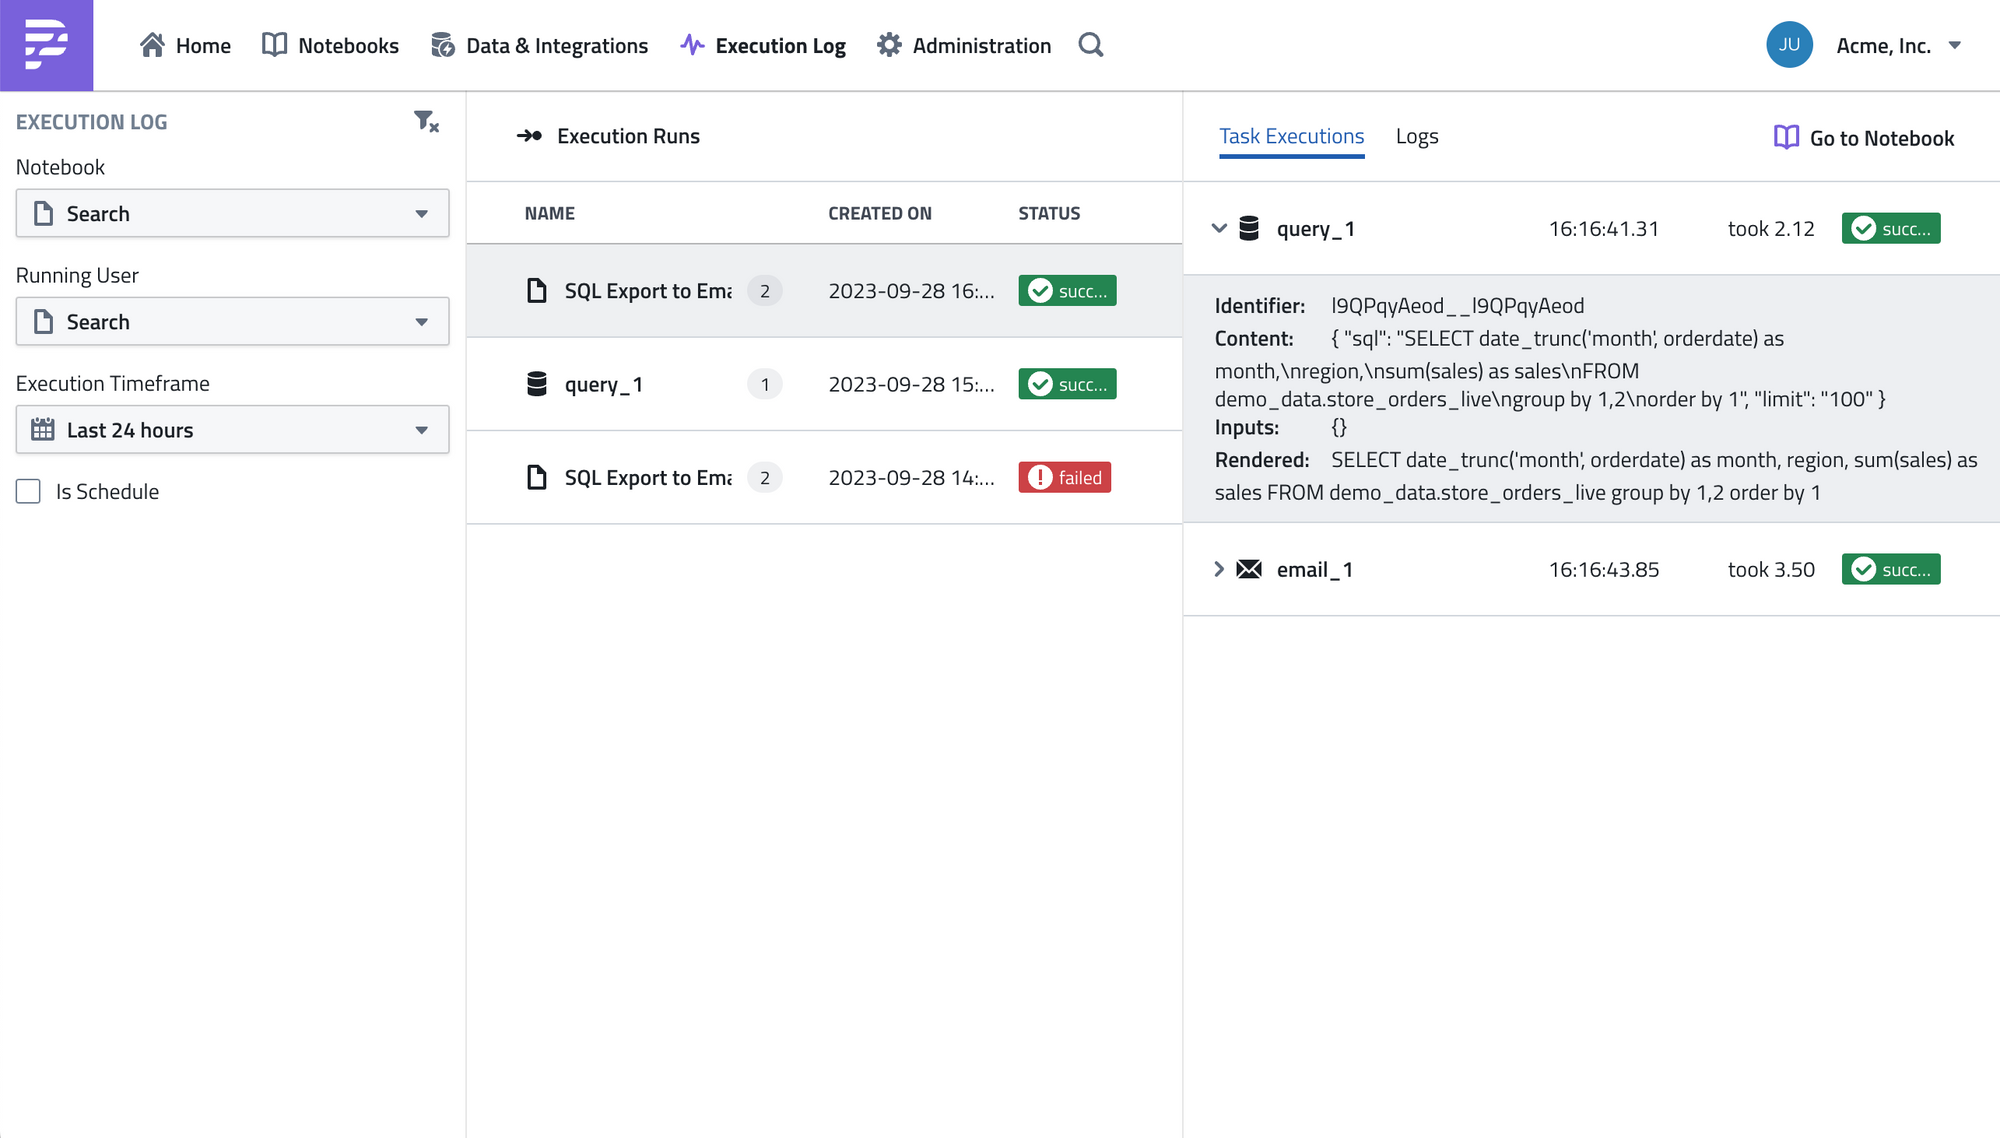
Execution Log
If you want to understand in more detail what has been run or if you need to debug problems, the Execution Log is a great resource.
You can find it in the left sidebar:
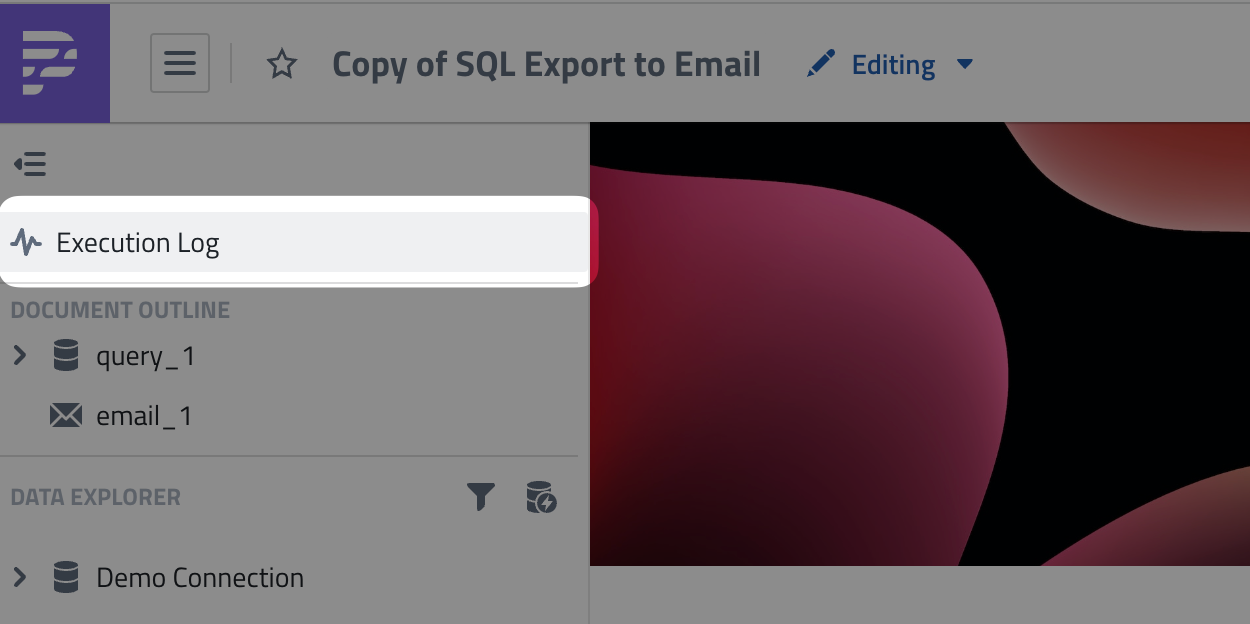
This will send you to the history of all the individual task and page executions of your current notebook.
Here you can find more details about the status of your runs and task executions and you can see the full log of an execution.
Share your Notebook
Finally, you may want to share your notebook with some colleagues.
PushMetrics notebooks can be easily shared with your team - pretty much like a Google Doc.
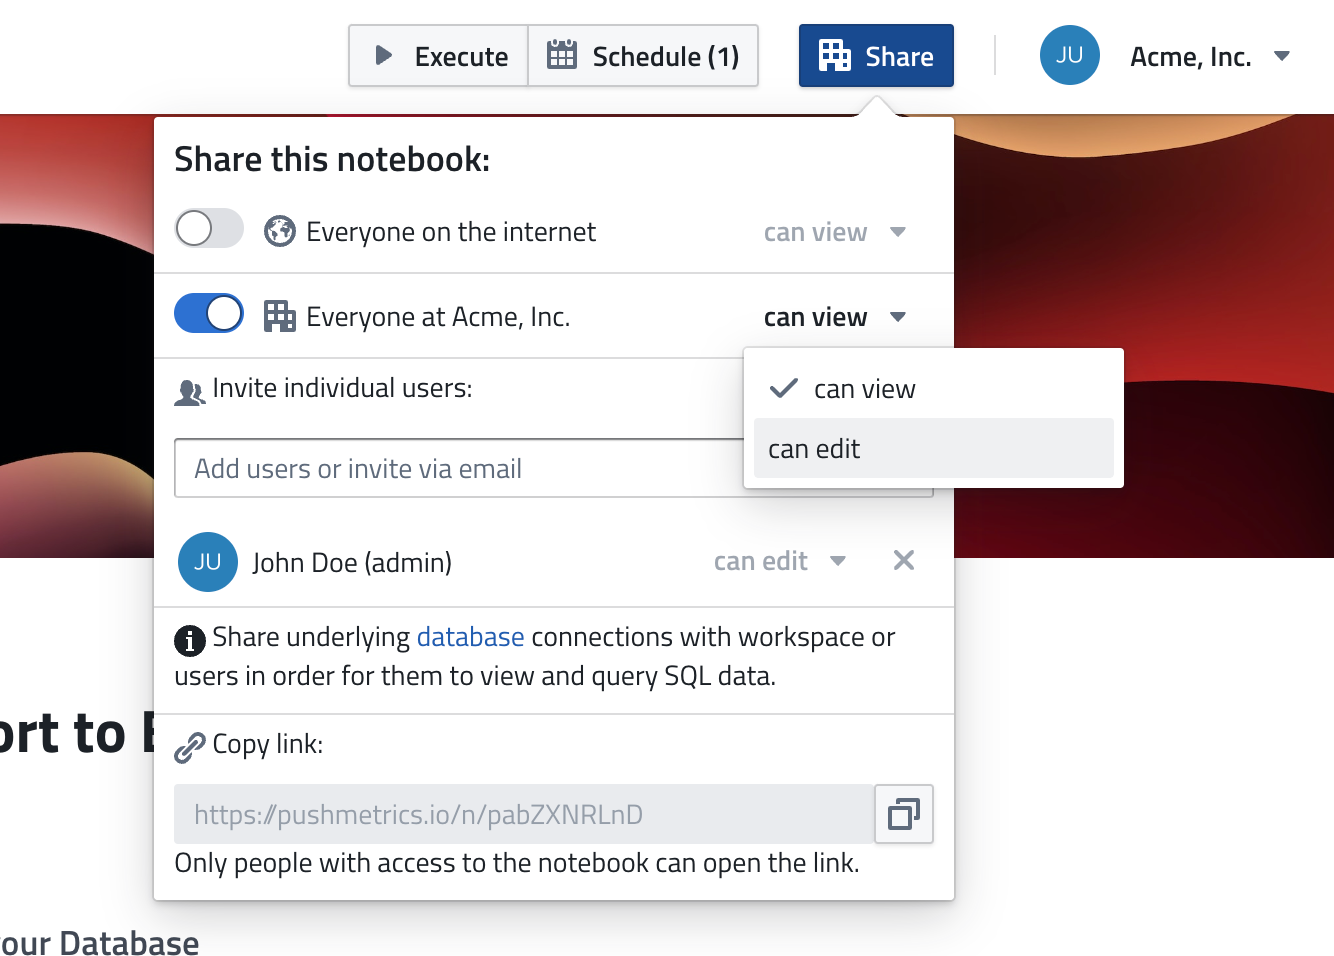
Just click on the "Share" button and define your sharing settings for the notebook.
That's it 🎉
Welcome aboard!
Don't hesitate to contact us if you have questions!

What's Next?
Check out the Advanced Guide for a tutorial where you create a more complex reporting pipeline using conditional statements, loops, slack messages, and more from scratch.