How to Implement Dynamic Reports in PushMetrics
Learn to create personalized reports with PushMetrics' Dynamic Reports. Tailor content for each recipient using SQL and dynamic fields, then schedule and send to Email or Slack for impactful communication.
Introduction
This guide takes you through the Dynamic Reports feature in PushMetrics, enabling personalized data distribution to Email and Slack. Dynamic Reports, or "Mail Merge Reports", as they used to be called in oder versions of PushMetrics (name inspired by an old Micrsoft Word feature), allow for individual customization of reports for each recipient, enhancing the relevance and impact of the information shared. To get started, ensure you have a PushMetrics account and necessary integrations such as SQL and Slack.
You may also follow along using the demo SQL connection that exists in every account.
The Basics
To follow this tutorial, you'll need:
- A PushMetrics account.
- A SQL integration connected to your account.
- An optional Slack integration for direct messaging.
Step 1: Create a New Report
Begin by navigating to the "Reports" section within PushMetrics and clicking the "create" button. Alternatively, you can use the direct link: pushmetrics.io/r/new.

Step 2: Configure Report Details
Name your report and choose the message type in the header, deciding whether you're distributing to Slack or Email.

Step 3: Activate Dynamic Reports
Click the switch on the Dynamic reports part of the report to activate dynamic distribution.

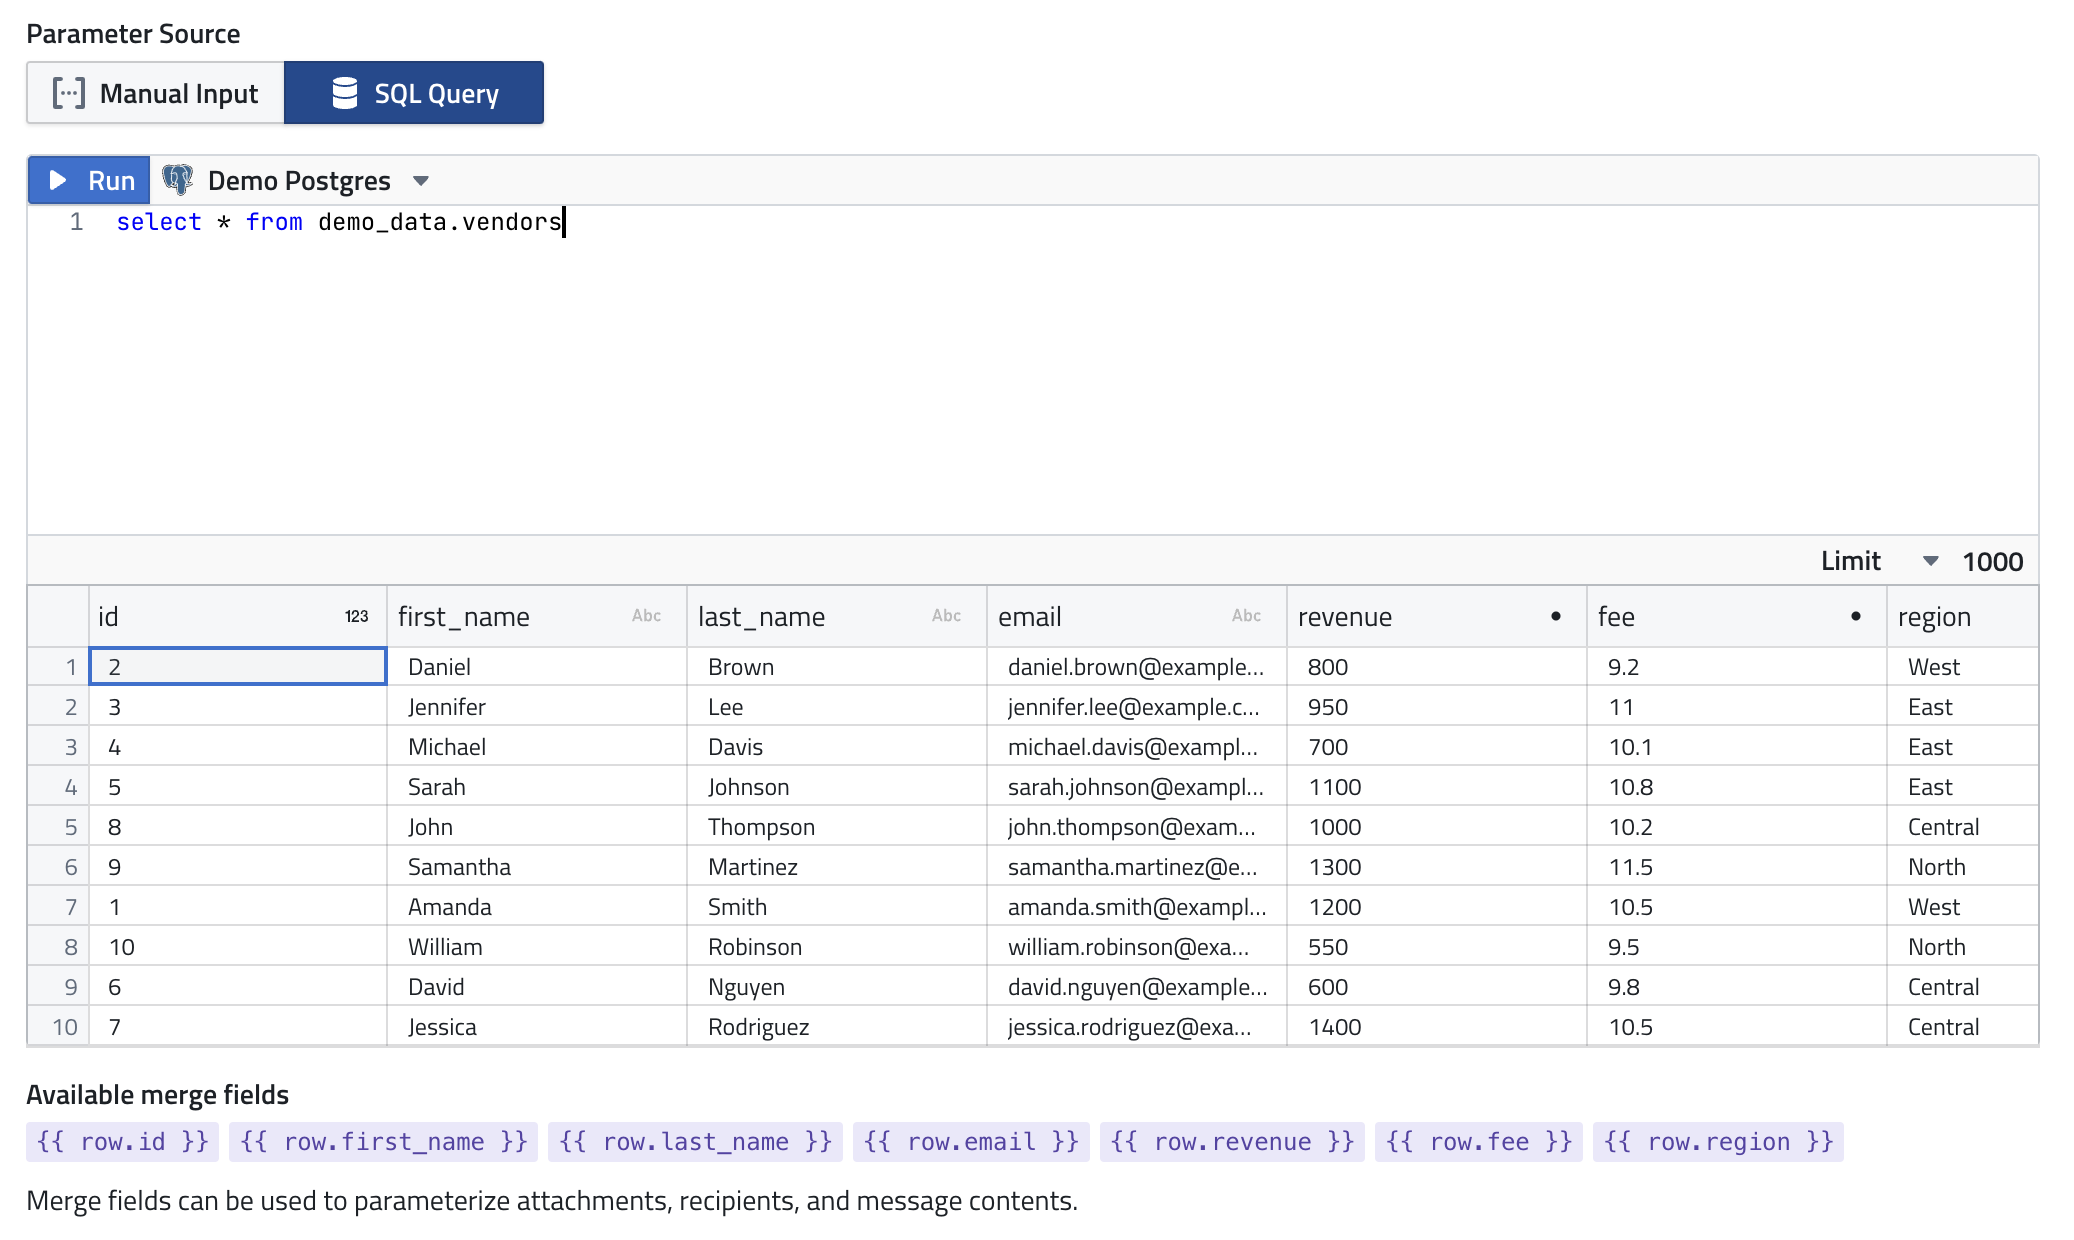
Step 4: Parameter Source Data with SQL
Dynamic Reports require a data source. Select the SQL Query Tab to and run a SQL query as usual to fetch data that your Dynamic report can be used on.
For example, you might use a query to select specific metrics or customer information.
In this example we are using the following query that you can copy and paste into your report:
Select * from demo_data.vendors;(Be sure to have the Demo Database selected)
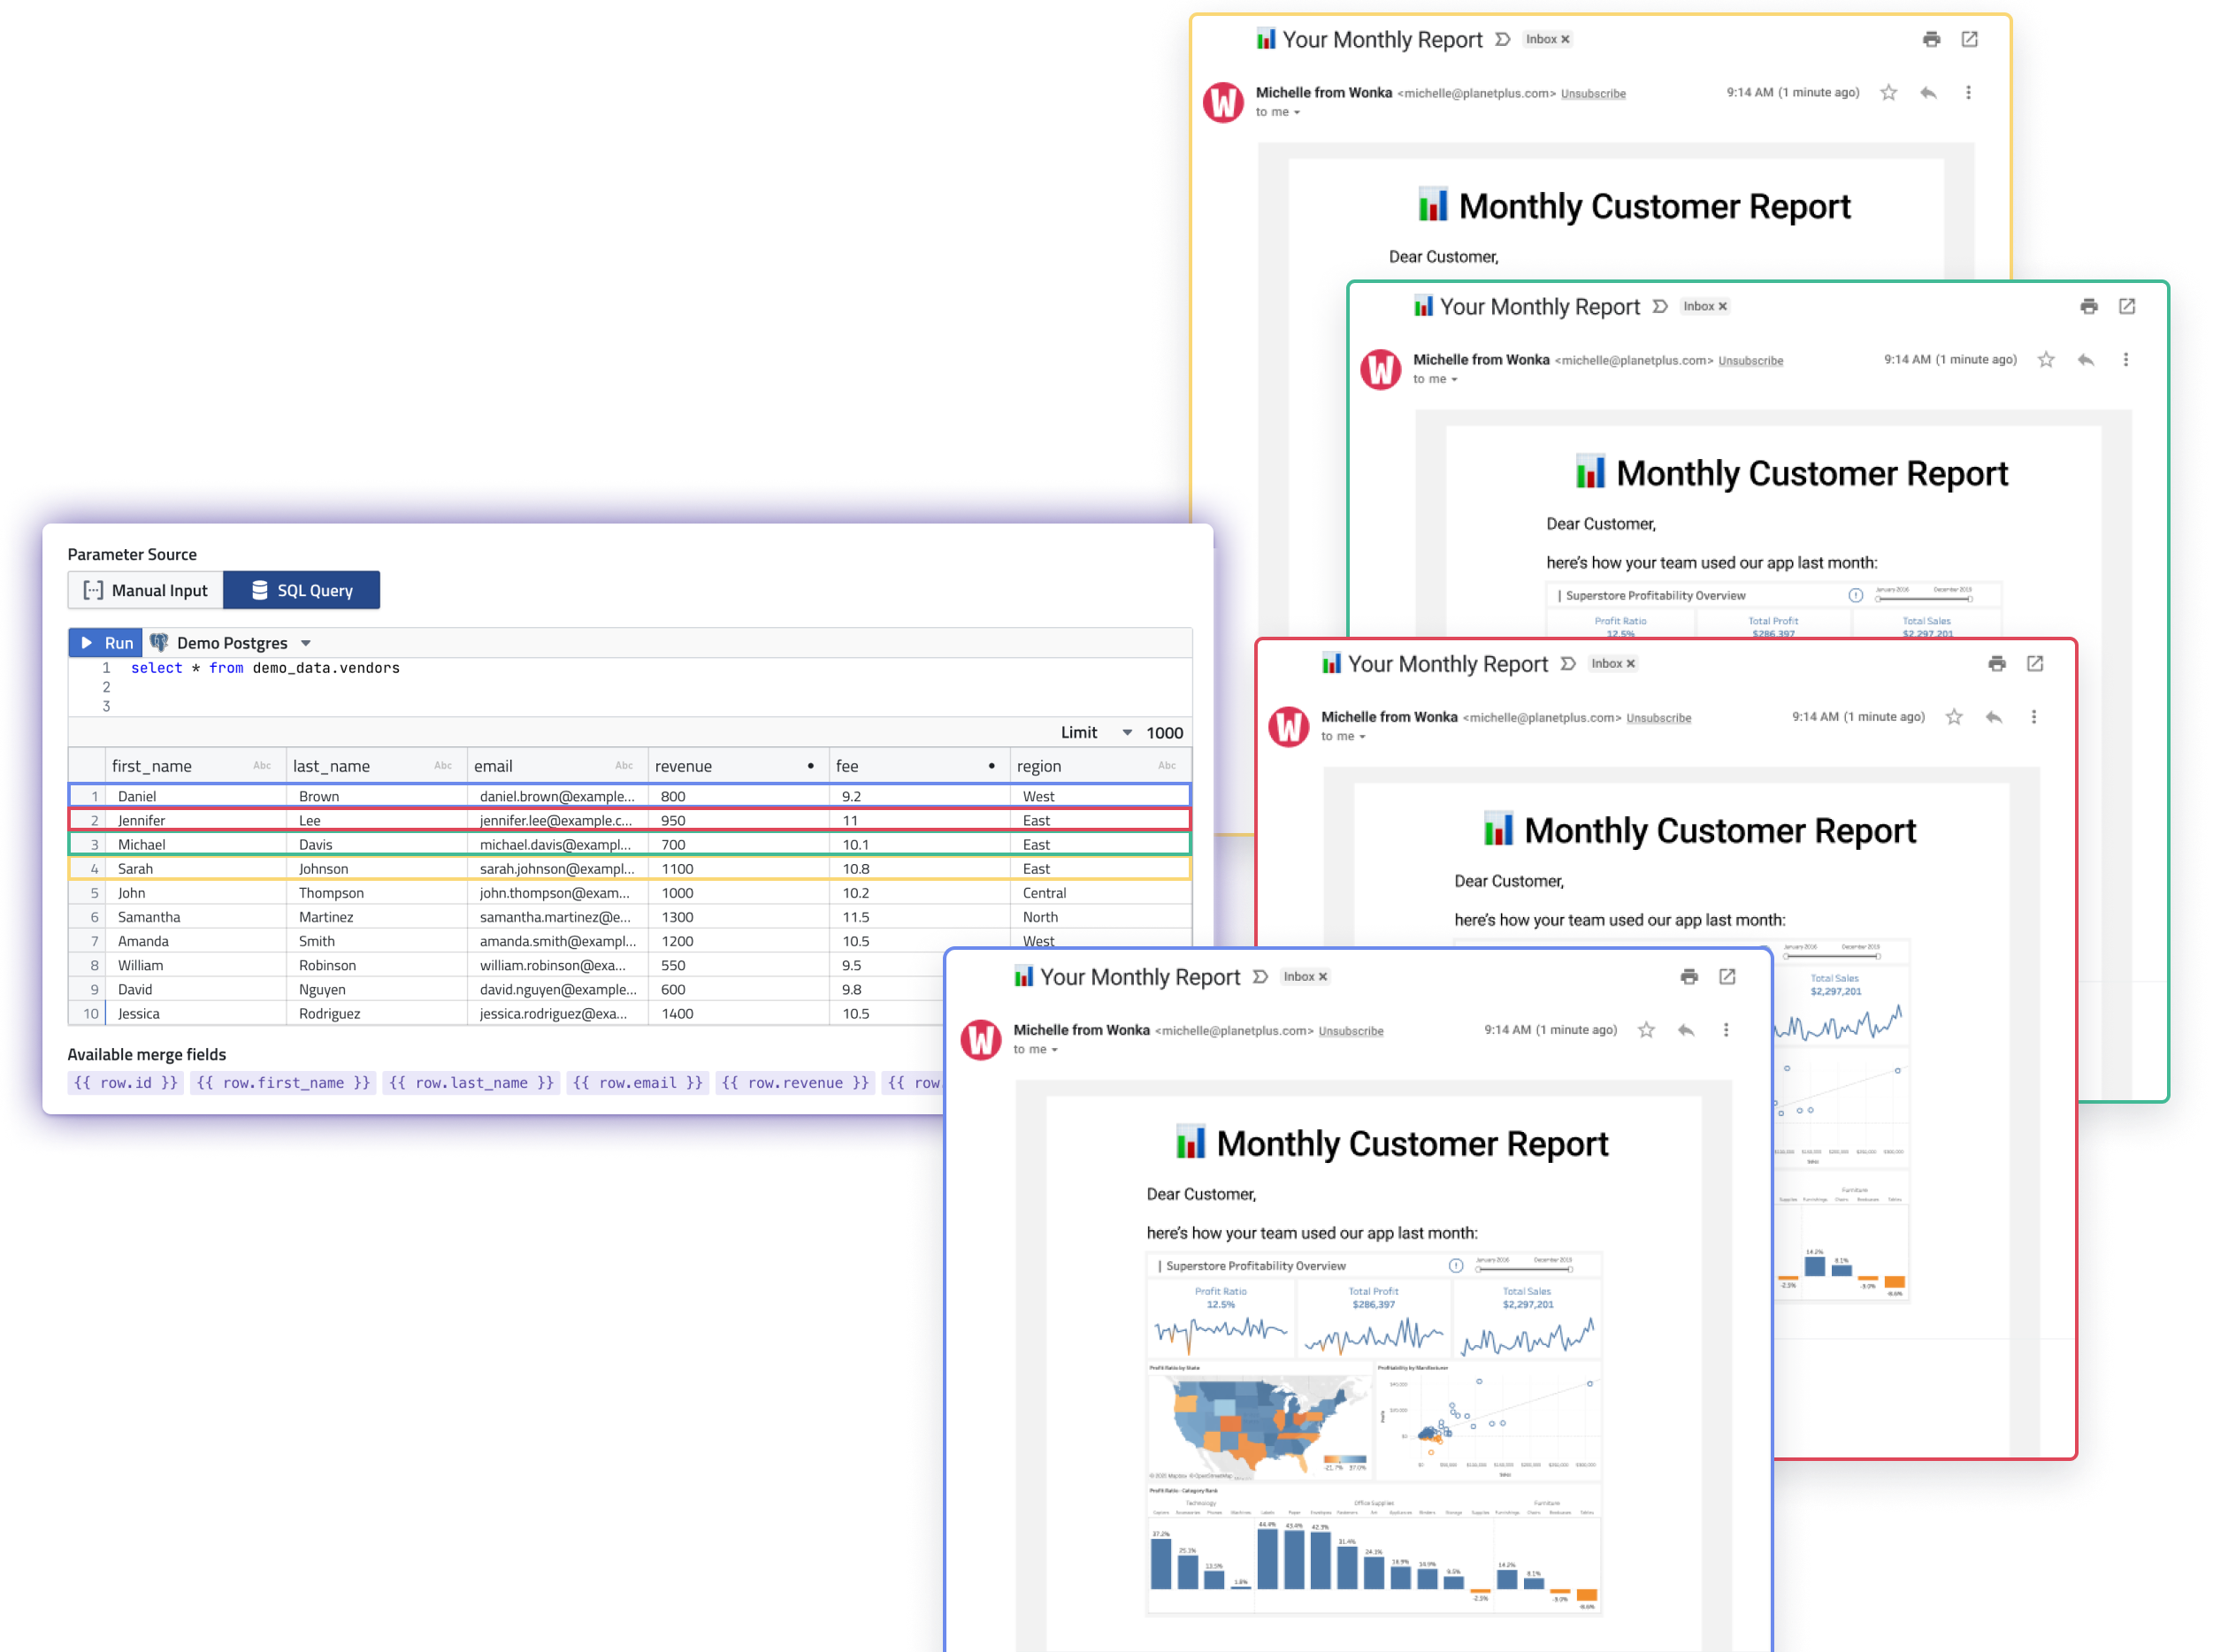
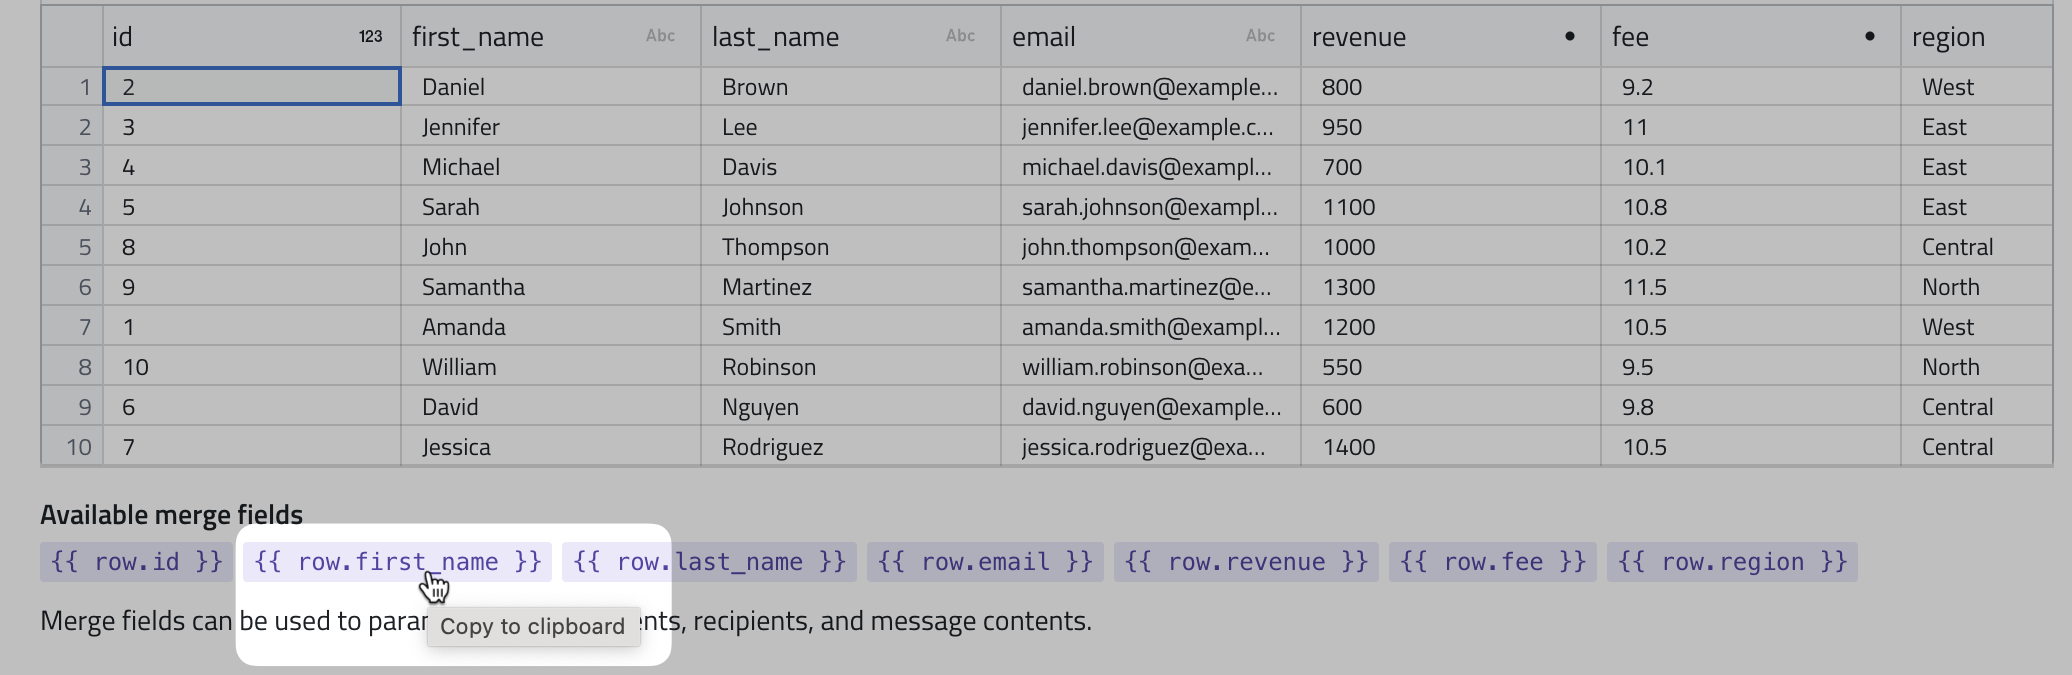
Step 5: Integrate Dynamic Content
With your data source established, use the dynamic parameters feature to personalize parts of your report. Click on the dynamic parameters to copy them, and paste them into your report content where necessary. These placeholders will be replaced with actual data when the report is run, tailoring each report to its recipient.
Step 6: Customize Your Destination
For Email, specify recipients, CC, BCC, and compose your message. Use the "Edit HTML" button for more design options. For Slack, input the channel and craft your message. Attachments and dynamic content will be integrated automatically.
Step 7: Schedule Your Report
Set a delivery schedule for your report at the bottom of the setup page. This ensures your report is sent out automatically at the chosen times, whether immediately or after testing.
Step 8: Save, Test, and Deploy
Finalize your report by clicking "save." You can then run your report from the reports menu to test its execution and review outcomes in the Execution logs.
Conclusion
Dynamic Reports revolutionize how data is shared, providing a personalized touch to each report sent through PushMetrics. By following these steps, you can leverage this feature to enhance communication with your team, clients, and stakeholders, ensuring each recipient receives information that's most relevant to them. For further assistance or to share feedback, please reach out to the PushMetrics team.
Kenneth Roos
Related Articles
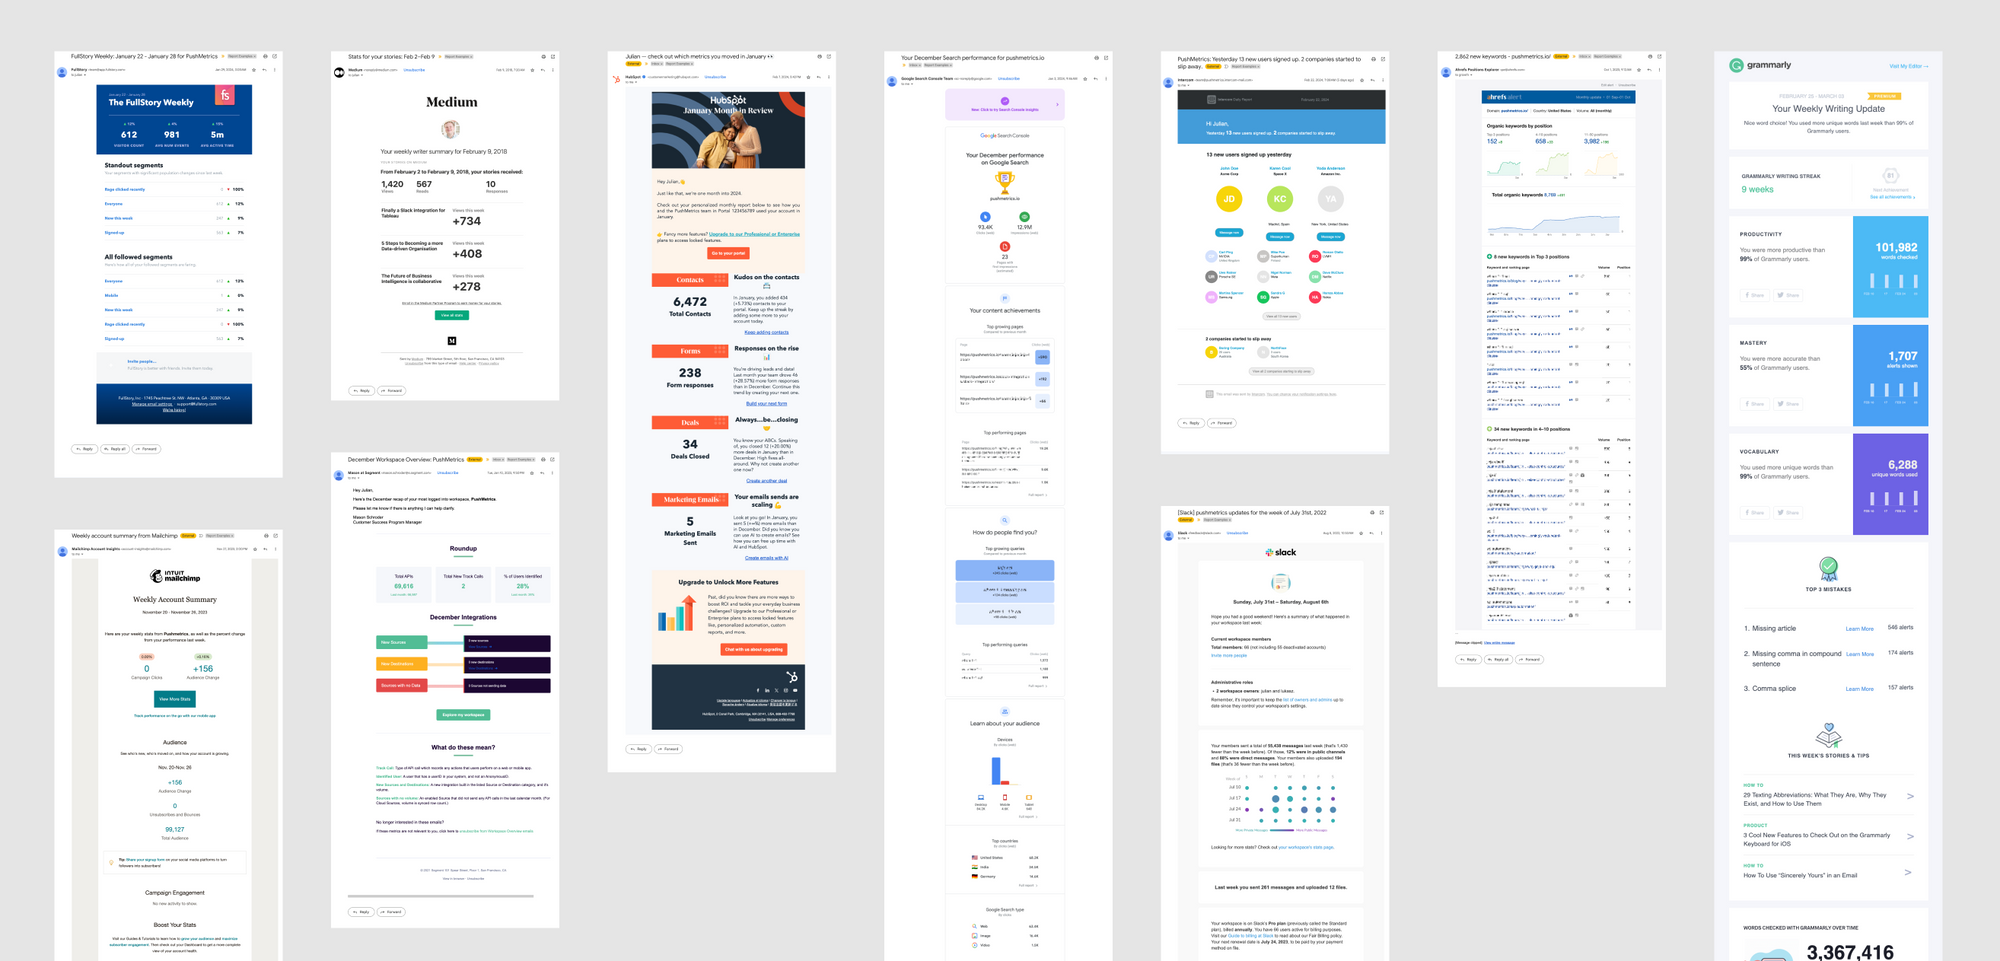
10 SaaS Usage Report Emails: How Companies Like Hubspot, Slack & Intercom Use Data To Maximize User Engagement
Product usage report emails are more than just automated messages; they're a window into how users interact with software, providing invaluable insights on engagement levels, feature adoption, and areas for improvement.

Julian Schulte
10 SaaS Usage Report Emails: How Companies Like Hubspot, Slack & Intercom Use Data To Maximize User Engagement
Product usage report emails are more than just automated messages; they're a window into how users interact with software, providing invaluable insights on engagement levels, feature adoption, and areas for improvement.
Julian Schulte
Subscribe to our newsletter
Get the latest updates from the PushMetrics team.
Thank you for subscribing.
Start sending data-driven messages today
Sign up and start using PushMetrics for free.
Or schedule a demo and discuss your use case.