How to Send Kpi Cards to Email and Slack
Send great looking KPI Cards to your Collueges and Customers using PushMetrics Reports.

Introduction
In this simple walk-through we will explore the new KPI cards feature and how to quickly implement a scheduled report that sends them out to Slack and Email.
If you are interested in MS Teams implementation please reach out, we do have a working prototype.
The Basics
To follow along with this qucik tutorial you will need:
- A PushMetrics account
- A SQL integration connected to your account. Watch a video about that here.
(you may use the Demo SQL Connection)
- A Slack integration (optional)
Step 1: Creating a new Report
To create a new report, simply navigate to the new "Reports" section and click the "create" button.
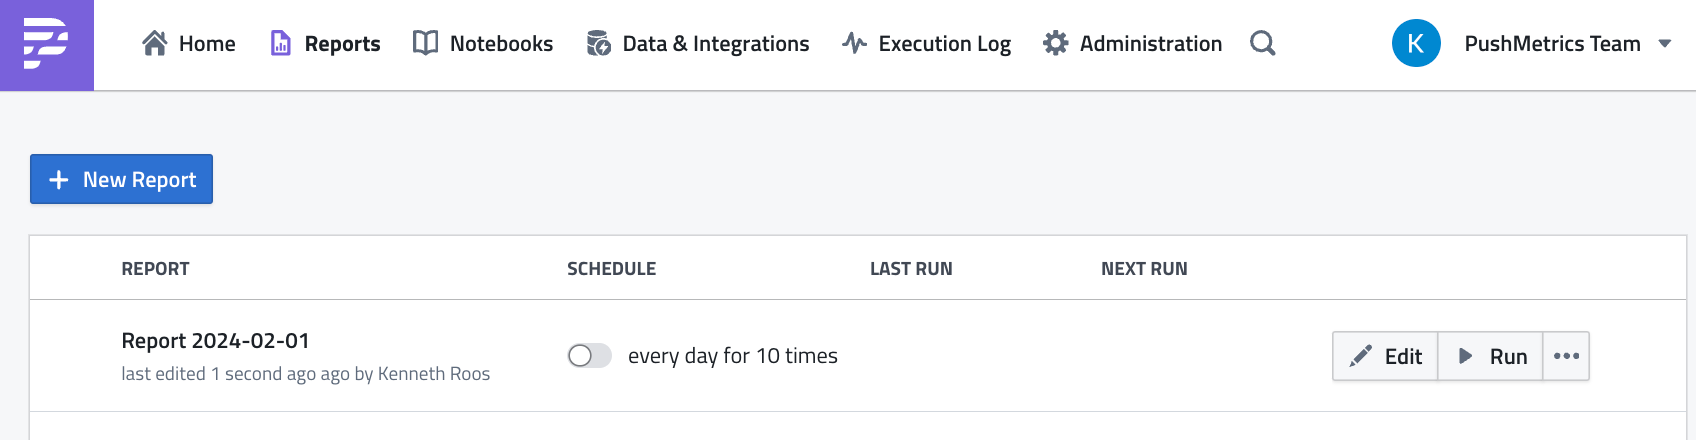
Alternatively, you can follow this link here: pushmetrics.io/r/new
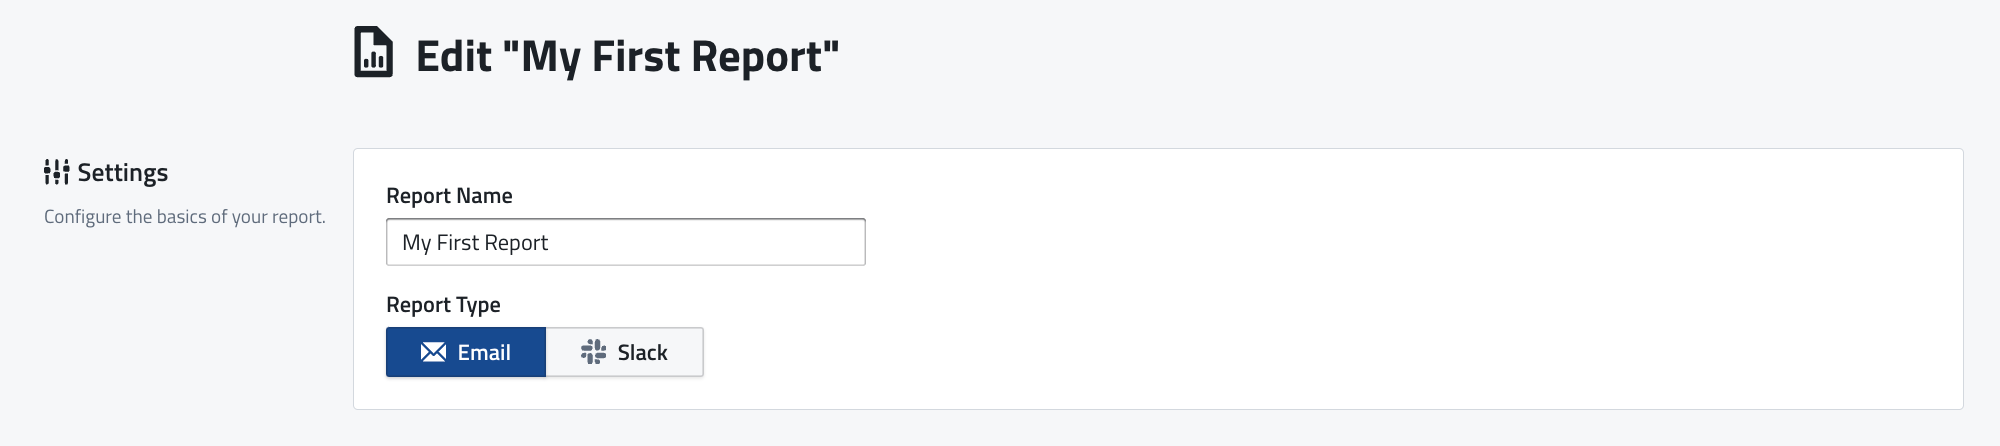
Step 2: Name and Type
Your report will need a name and a message type.
You can make these choices in the header part of the report.
Are you sending to Slack or to Email?
Step 3: Get data from SQL
For this example we are sending a simple KPI Card to Slack and Email.
We do need a SQL Query as base data but we will not send the data along with the KPI card in this example.
Click the "SQL" button to create a SQL attachment.
All PushMetrics accounts have the Demo Connection available.
Feel free to use this query as an example:
select
	date_trunc('month', order_date) as month
	,to_char(date_trunc('month', order_date), 'DD Mon YYYY') AS formatted_date
	,sum(price) as sales
from demo_data.car_sales
group by 1,2
order by 1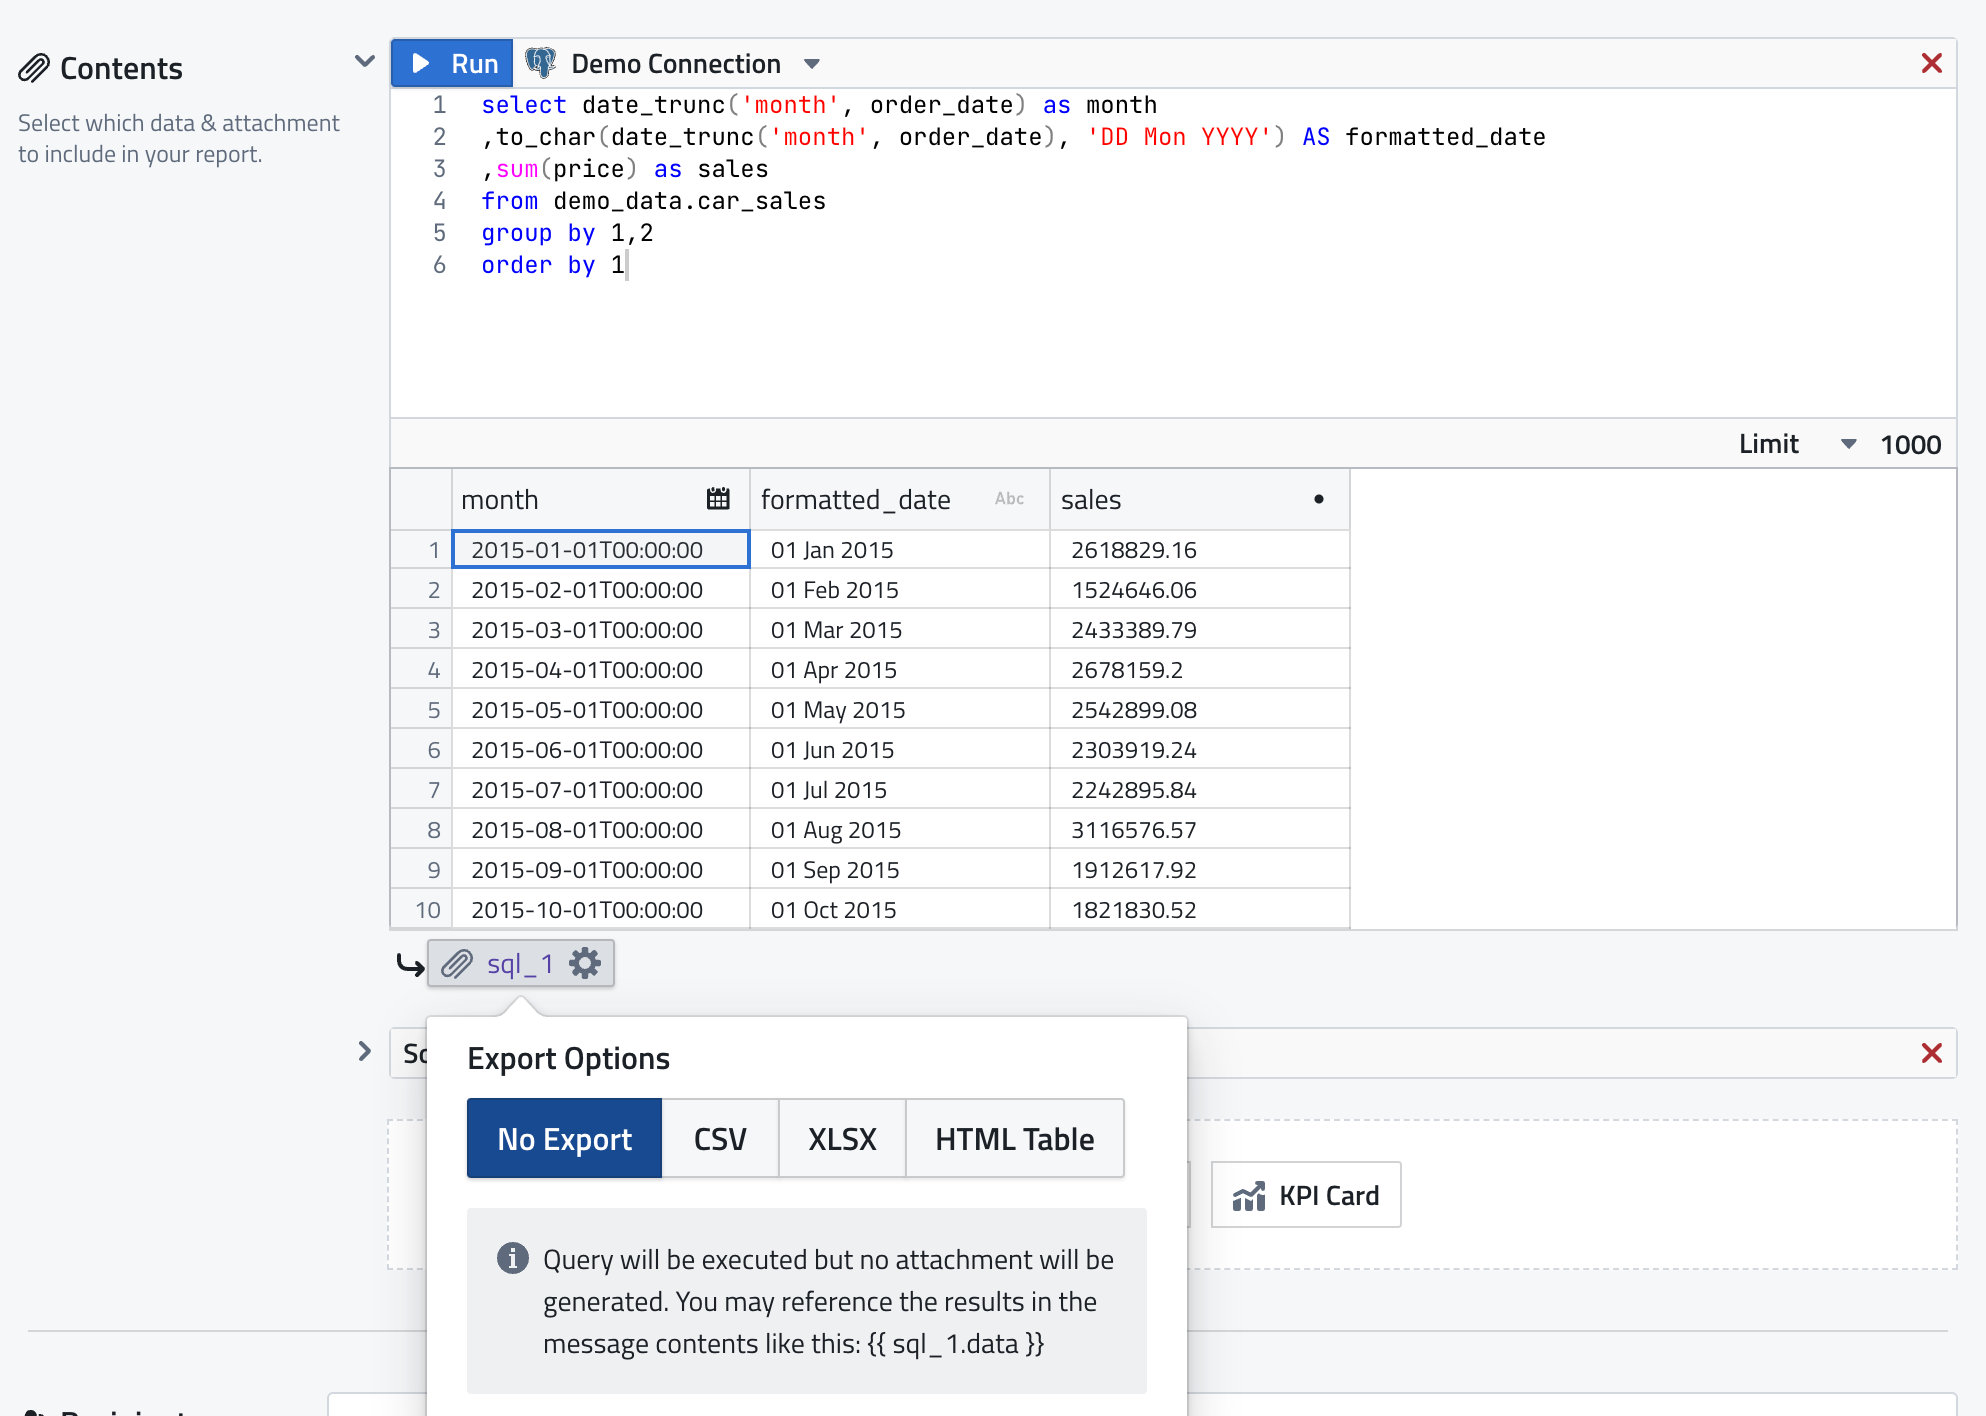
You may run your query and then choose "No Export" as the file output. This will keep the query only for reference and keep it from being attached as a separate file.
If you would rather attach the ouput, feel free to do so. It will not affect the KPI Card.
Step 4: Create your KPI Card
Click "KPI Card" and make sure to choose the above SQL query as a source:
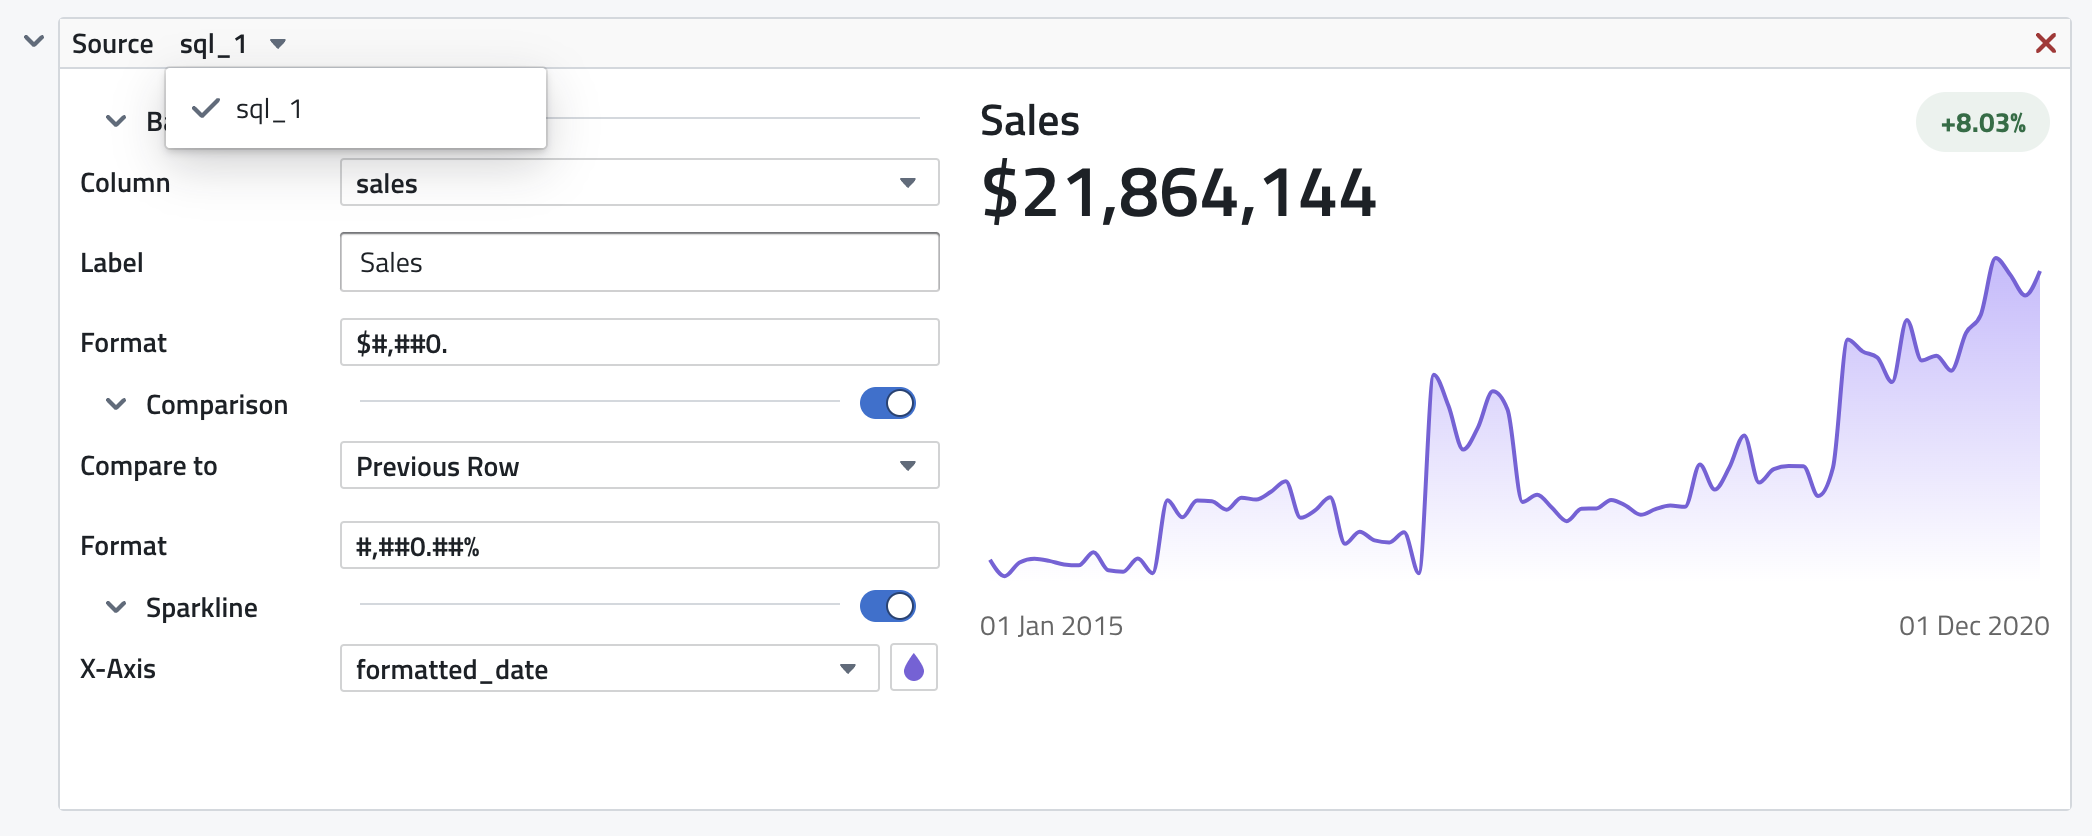
For this example, I chose
- Sales as the Column to be displayed
- Captilalized spelling for the label
- Number formatting that has a $ sign and ignores digits behind the decimal point (`$#,##0.`)
- Compare to the previous row in the comparison tag, formatted as percentage with two decimal points.
- An Indigo Sparkline using the "formatted_date" column.
Step 5: Set up your Destination
All that is missing is your message now.
For Email put in the recipients, CC & BCC, and write out your message. You can click the "Edit HTML" button to create a full-fledged designed email for your company.
For Slack put in the channel and write out a message.
In both cases, your attachments will be added to the messages automatically.
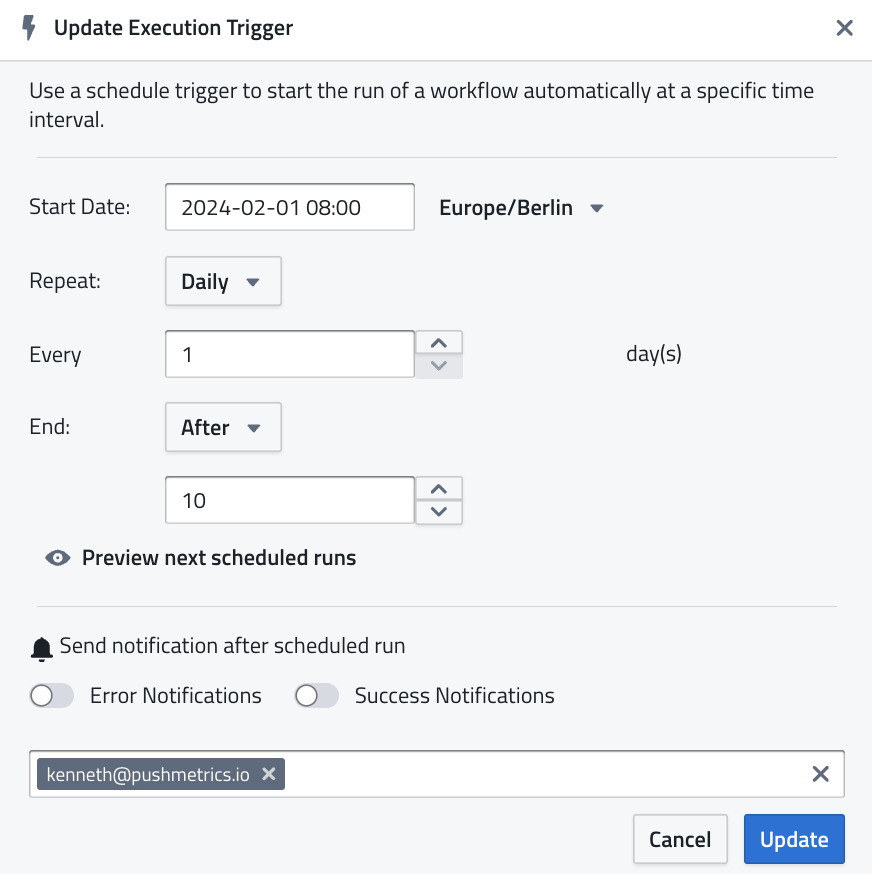
Step 6: Set a Schedule
In the very bottom of your report you ahve the option to set a schedule for your report. You can activate it right away or once you are finised testing it in the reports menu.
Step 7: Save and Run.
Click save to the bottom right of the article. Once saved you can run the reports in the reports menu and review its execution in the Execution logs.
Kenneth Roos
Related Articles
10 SaaS Usage Report Emails: How Companies Like Hubspot, Slack & Intercom Use Data To Maximize User Engagement
Product usage report emails are more than just automated messages; they're a window into how users interact with software, providing invaluable insights on engagement levels, feature adoption, and areas for improvement.

Julian Schulte
10 SaaS Usage Report Emails: How Companies Like Hubspot, Slack & Intercom Use Data To Maximize User Engagement
Product usage report emails are more than just automated messages; they're a window into how users interact with software, providing invaluable insights on engagement levels, feature adoption, and areas for improvement.
Julian Schulte
Subscribe to our newsletter
Get the latest updates from the PushMetrics team.
Thank you for subscribing.
Start sending data-driven messages today
Sign up and start using PushMetrics for free.
Or schedule a demo and discuss your use case.